

Faun SLT-56
Tank Transporter
Kit Construction
by Terry Ashley
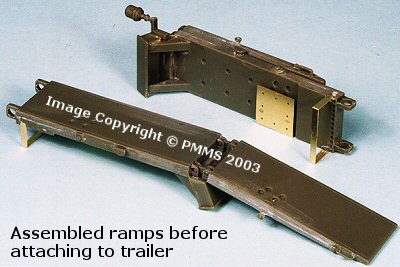
The outer ramp halves (parts H9, H10) are glued together trapping the moving
hinges (parts I50) between them, make sure you don’t get glue on the
hinges if you want the ramps to articulate later. After the glue had dried
there were the fairly large join seams to eliminate along the edges which
were a bit time consuming but not difficult.
The inner ramp halves (parts H27, H28) were glued to together but I found
the locating pins on part H28 were on opposite sides to the holes on part
H27 so I simply cut off the pins and glued them together directly. The seams
were dealt with in the same manner as the outer ramp, after which the top
support box (part H5) was attached as were the lower etched frame and warning
placard plate without any problems.
After the two ramps were finished as separate items they are then joined together by trapping the hinges on the outer ramp to the top of the inner ramp with the retaining bracket (part I48). Again make sure no glue gets on the hinges or retaining bracket so they will move freely.
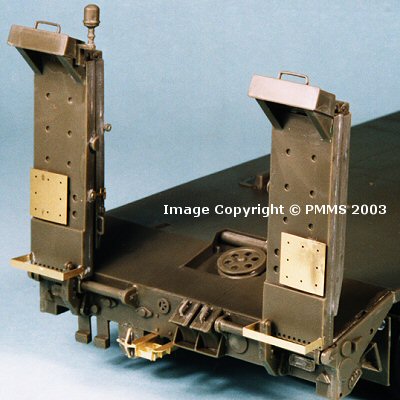
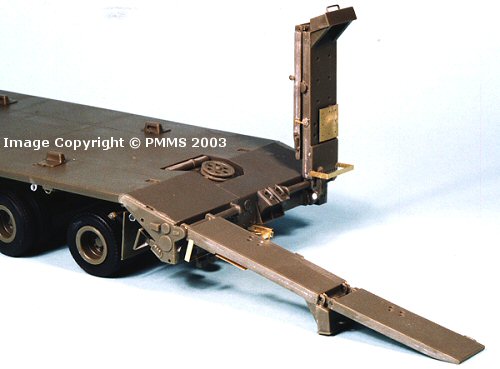
Once the glue has dried completely on the hinge bracket the ramp can be attached to the rear of the trailer which can be tricky as the ramps are quite large while the part that holds them in place (H31) is quite small, but thankfully the outer bracket is moulded as part of the trailer frame which does help a lot. I firstly attached the raising mechanism arm (part I40) to the rear trailer making sure not to get glue on the retaining brackets (parts I39) so the arm is fully movable and allowed the glue to dry completely before proceeding.
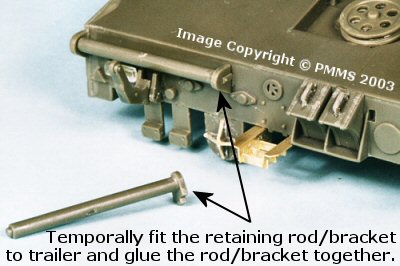
To make attaching the ramp easier I firstly temporally fitted the ramp retaining rod (part I11) and the inner bracket (part H31) to the rear trailer and glued the rod and bracket together making sure not to glue the bracket to the trailer at this stage.
When the glue has completely dried on the rod/bracket join I then slipped the rod through the ramp hinge holes after firstly test fitting to make sure the rod went through the holes smoothly, a quick clean up with an appropriate sized drill bit beforehand made this easy.
Due to the above step of joining the rod/bracket you now only have the join of the bracket to the rear trailer to worry about to secure the ramps which is a lot easier than trying to align the rod, bracket and ramp all at the same time.
The other small fittings to the rear trailer went together without problems although the etched fitting in the centre has multiple parts and can be a bit tricky to assemble. After bending the two outer parts (PE10, PE11) I secured these with a piece of tape to a flat surface and slipped the inner parts (PE8) in place and added drops of CA glue to fix in place, when cured I removed the tape and attached the assembly to the trailer.
Tractor Assembly: Steps 1 to 24.
Step 1 to 5: Cab Assembly.
Step 6 to 10: Chassis and Suspension.
Step 11 to 13: Fuel Tank, Spare Tire and Chassis details.
Step 14 to 19: Rear Tractor Assembly (1).
Step 20 to 22: Rear Tractor Assembly (2).
Step 23 to 24: Adding hoses and piping.
Trailer Assembly: Steps 1 to 14.
Step 1 to 5: Deck underside and Suspension.
Step 6 to 7: Gooseneck Assembly.
Step 8 to 10: Final Deck Assembly.
Step 11 to 13: Ramp Assembly.
Step 14: Attaching Trailer to Tractor.
Return to the first look review of the kit.
Page created 5 October 2003