
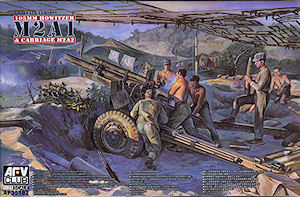
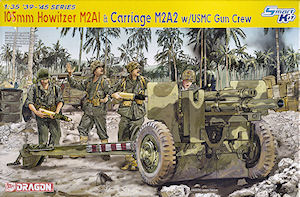
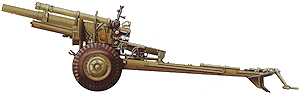
105mm Howitzer M2A1 & Carriage M2A2
1:35 Kit Comparison
Review by Terry Ashley
The shield segments are moulded uniformly thin without any hint of pin marks but may have reached the limits of injected plastic of how thin you can mould a flat piece in plastic as a couple of the parts did have some slight twists, warping seems to heavy a description with this most noticeable on the longer lower flap section and some gentle coaxing will be needed to realign the segments if this is apparent on your kit parts?
The rivet and bolt head detail on the shield segments is very well done and the large inner mounting brackets have the correct sized lightening holes but the kinked sections of the brackets are oversized in length and should be a little shorter. On the lower flap the hooks for securing in the raised position are separate parts for proper hooks which attach to the securing latch on the upper shield sections when raised for a good appearance.
Some minor trimming of the hinges was needed for a good snug fit and test fitting will determine the extent of this with the assembled shields fitting securely to the bottom carriage due to the large mounting brackets and once attached the two small axle lock levers (parts D23) can be added as noted above.
The smaller outer shield is moulded in one uniformly thin part and again is free of any pin marks or other blemished with separate mounting bracket arms and a two part sight storage box that allows you to position the lid open if you wish? The sight box also has separate mounting brackets for added detail definition although these are a little thick due to limitations of plastic moulding and thinning these a little will improve the appearance further,
The two mounting bracket arms have the correct profile (shape) but the lightening holes are a little undersized and drilling these a bit bigger will improve the appearance. Fitting the outer shields is a little tricky as there is not a lot of room to get at these with the larger shields and other items on the carriage in place so care is needed while fitting.
![]() (Step 3,4) The twin shield arrangement is the main visual indicator of the later M2A2 carriage with the kit having the larger rear mounted shield in a single part moulded uniformly thin without any hint of pin marks. This means you can’t show the lower flap folder for travel without some cutting but it does make for simple assembly because there isn’t any other than the separate inner mounting brackets and front flap attachments. The hooks on the lower flap are moulded solid and lack definition and could be replaced with thin wire for a better appearance?
(Step 3,4) The twin shield arrangement is the main visual indicator of the later M2A2 carriage with the kit having the larger rear mounted shield in a single part moulded uniformly thin without any hint of pin marks. This means you can’t show the lower flap folder for travel without some cutting but it does make for simple assembly because there isn’t any other than the separate inner mounting brackets and front flap attachments. The hooks on the lower flap are moulded solid and lack definition and could be replaced with thin wire for a better appearance?
The rivet and bolt head detail on the shield is a little under done in places while the large inner mounting brackets have oversized lightening holes but the kinked sections of the brackets have the correct profile.
The smaller outer shield is again moulded in one uniformly thin part free of any pin marks or other blemished with separate mounting bracket arms and a one part sight storage box with the mounting brackets moulded onto the shields.
The left side mounting bracket arm has the incorrect profile (shape) but the lightening holes are the right size. Fitting the outer shields is a little tricky as there is not a lot of room to get at these with the larger shields and other items on the carriage in place so care is needed while fitting.
As noted above the lower shield mounting brackets (parts B10, B11) are too short resulting in the small shield sitting at the wrong angle with the bottom edge leaning inwards and you should add a small 1.5mm spacer to the end of the brackets from thin plastic strip to allow the shield to sit at the correct upright angle.
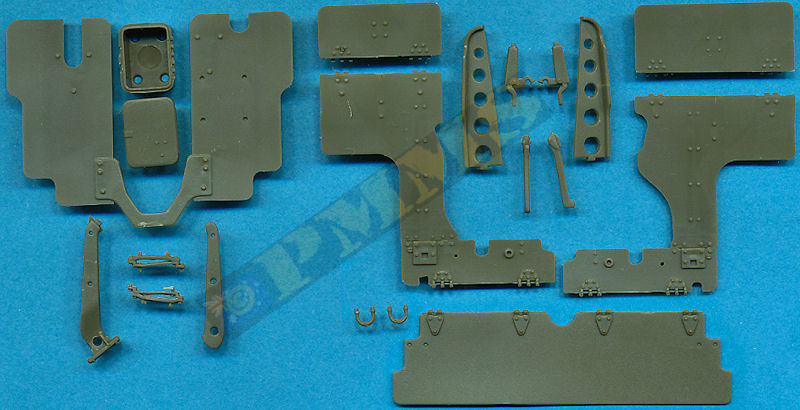
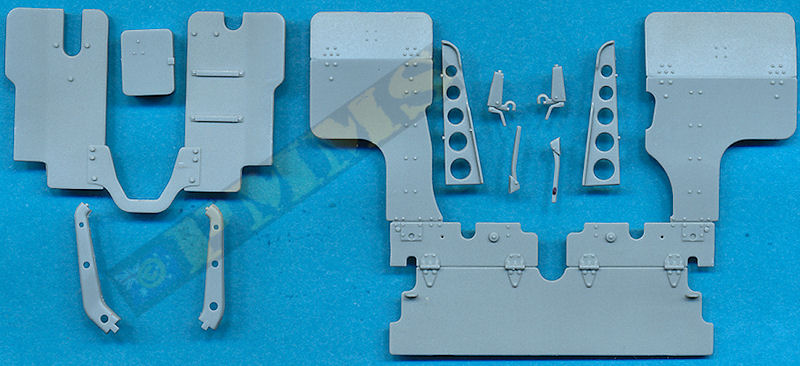
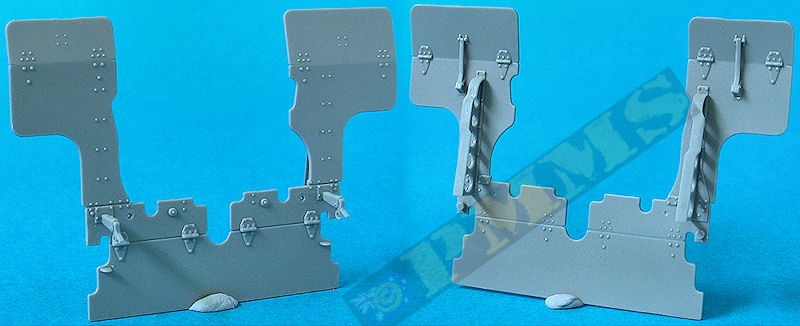
Basic shield parts, separate large AFV Club shield parts allow the flaps to be folded for transport.
Both shields are dimensionally good and moulded a uniform thickness, which is quite thin for scale effect.
The AFV Club shields are probably as thin as would be possible with injected plastic but this leads to some minor warping of the panels and may need
to be 'twisted' lightly back onto alignment, the slightly thicker DML shields don't have this issue.
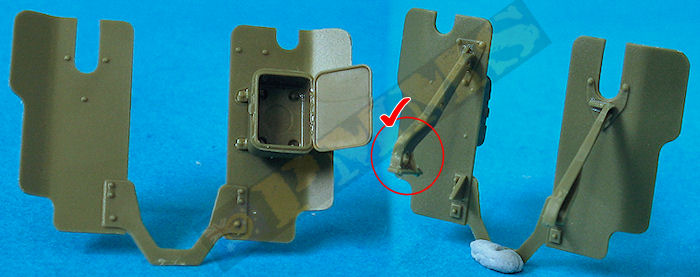
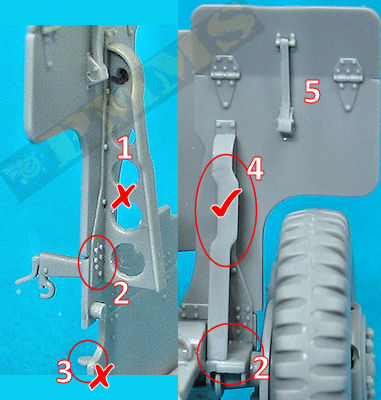
Assembled small shield, the AFV Club sight box has a separate lid allowing this to be shown open if you wish.
The small holes in the support arms are too small on the AFV Club arms and need to be enlarged while the contours at the base of the
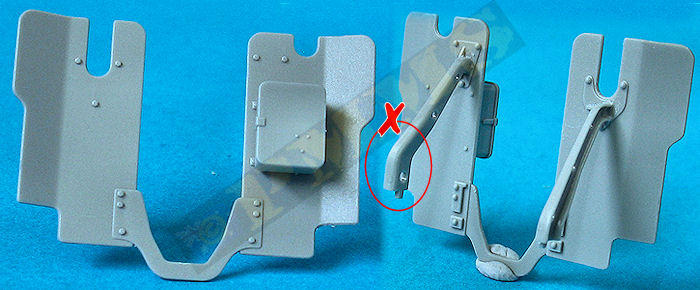
left support arm are the not correct on the DML arm and should 'kink' outwards more.
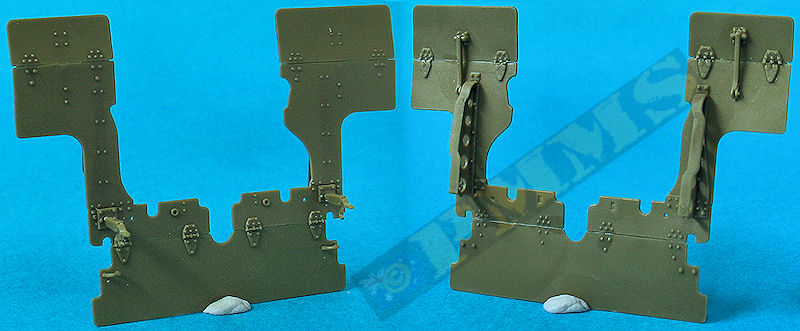
Assembled large shields
As mentioned the separate AFV Club shield flaps allow these to be repositioned for transport while the DML flaps are fixed in the firing mode.
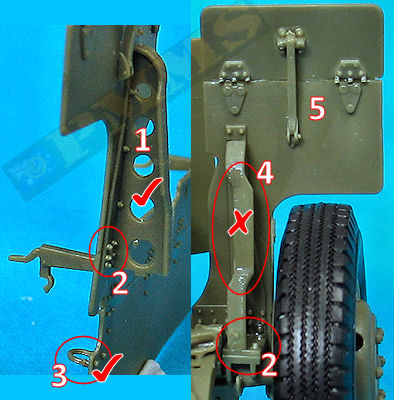
Issues with the large shields.
1. The lightening holes in the DML support brackets are too big.
2. Bolt heads better defined on AFV Club shields and mountings.
3. Hook on lower flap open on the AFV Club shield but solid on the DML shield.
4. The offset contour of the AFV Club support is to elongated and should be shorter as on the DML support.
5. General detail definition more refined on AFV Club shields such as the hinges and upper flap support arm brackets.
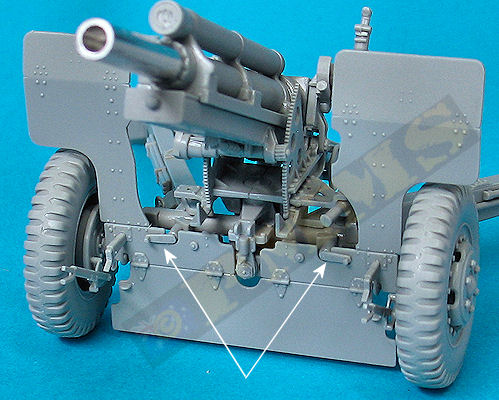
Larger shields added to carriage, note the two small locking levers should not be fitted till after the shields.
No problems fitting to either kit.
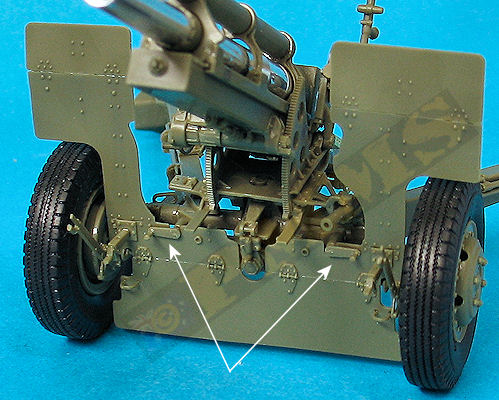
Smaller outer shields fitted, a little fiddly on both kits due to the location of the mounting brackets.
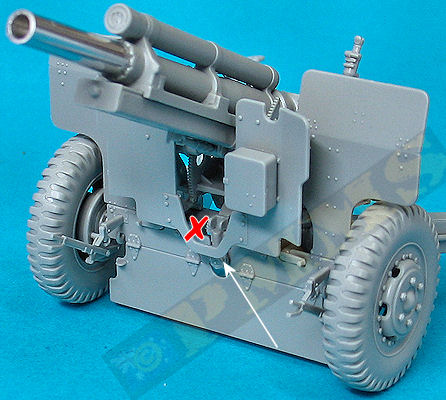
Note the bottom of the DML small shield sits too close and angled slightly into the larger shield due to the shorter bottom shield mounting arms
as mentioned previously. Adding small spacers to the mounting arms will bring the shield out to the correct alignment.
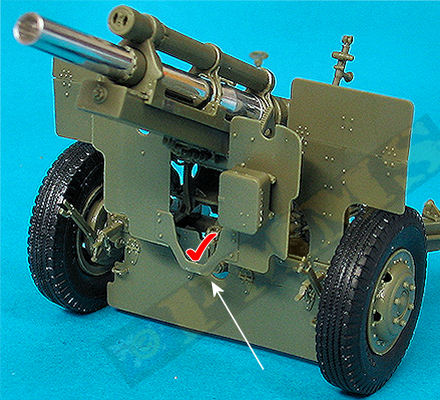
The AFV Club shield has the correct spacing and alignment with the larger shield.
| to Chapter 7: Additional Items: |
