
Sherman Foul Weather Driver's Hood
1/35 #F035
Review by Terry Ashley
The hood in this new set from Formations is for the small hatch 56° hulled Shermans and consists of seven resin parts and a small clear sheet printed with the defroster grid.
The quality of the casting is excellent without any blemishes and just the usual casting blocks to be removed but due to a couple of extremely small parts care will be needed during cleanup.
The instructions give a warning that this set may cause “profanity or insanity” and Rob wasn’t kidding.
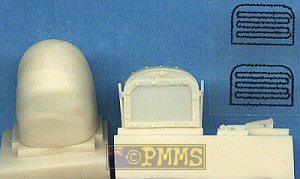
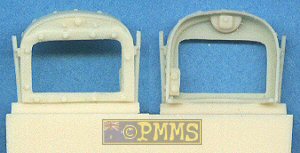
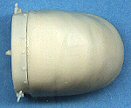
The large rear canvas hood is a simple hollow casting easily removed from its casting block and has subtle texturing and ‘ribbing’ for the canvas supports while the front panel has the side securing pins included and extreme care is needed not to damage these while removing the casting block.
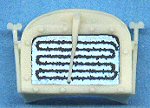
Details on the front panel include rivet details on the side, top and front with the windscreen wiper motor and defroster junction panel on the inside.
It is best to cut out the resin ‘film’ from the front panel opening while it is still attached to the casting block as this gives you something to hold onto as it would be almost impossible to do later without damaging something.
The small wing nuts for the top of the securing pins are separate parts and you get two spares in case of mishap along with the separate windscreen wiper. Removing these from their casting block should be done with a very sharp scalpel blade well over a table or even in a large kit box top so that if they decide to take off into the modelling abyss you should be able to find them easily.
The clear sheet has two defroster grids printed on to again allow for mishaps as well as a printed template on the instructions if you need to cut another; also on the instructions is a printed wiper arc template to help with the painting.
You have to take care when attaching the wing nuts and wiper blade as there isn’t a lot to hold onto which is where Rob’s warning comes into play, but by using a fine pair of tweezers under a strong light (and a magnifier didn’t go astray either) I was able to assemble these without loss or damage without one profanity, which is not bad for me. After all we all know that if a part won’t fit swearing at it always works, just ask the neighbours?
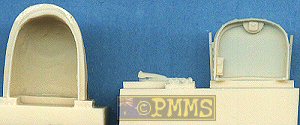
Fitting the front panel to the rear hood needed some minor trimming at the bottom corners but with a bit of test fitting it went together okay while attaching the hood to the target kit may require some trimming of the kit hatch hinges and hatch rims, this may differ depending on which kit you use as the hood can be used on virtually all early Shermans from Dragon and Tamiya plus any of the resin hulls available.

The instructions consist of an exploded view drawing of the hood components and text notes to assist with construction.
Conclusion:
Overall a well detailed little assembly with extremely fine parts that will
need care during and after assembly, especially with the wing nuts if drybrushing
as they stick up just asking to be broken off. The clear glass panel and
hollow hood provides room for the driver’s head to add a bit of animation
and will certainly give a different dimension to your Sherman.
Highly recommended.
Check the Formations website for details of other update sets available and thanks to Rob for the review sample.
Page created 15 October 2004