
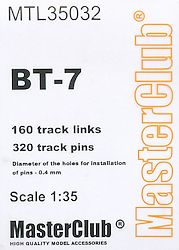
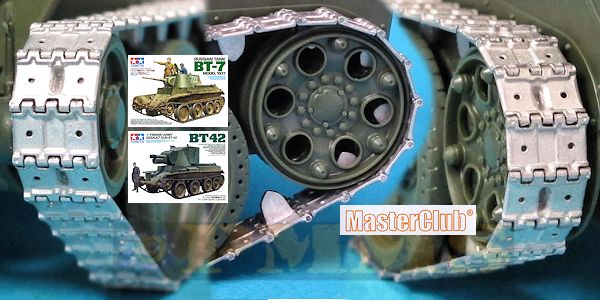
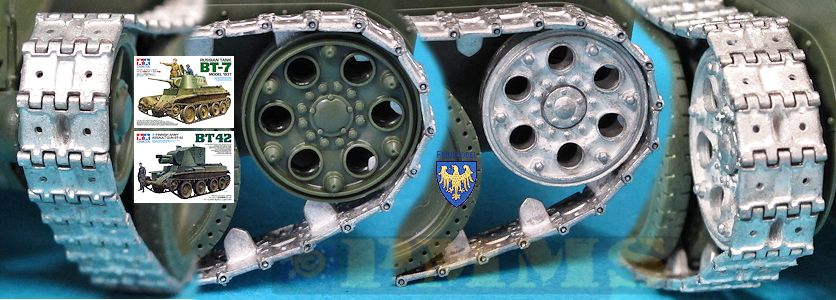
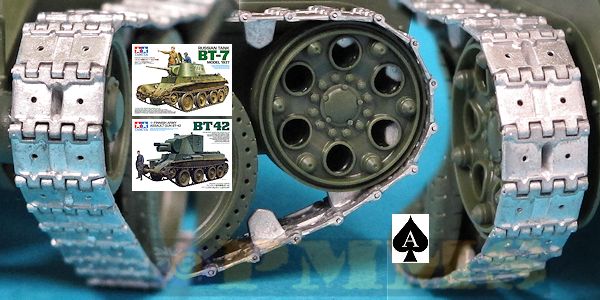
BT-7 track
Master Club 1:35 Scale Set # MTL35032
Review by Terry Ashley
The set consists of 160 cast metal track links, 80 with the guide horn and 80 without the guide horns and 320 small resin 0.4mm track pins that are designed to pin the links together without the need for gluing.
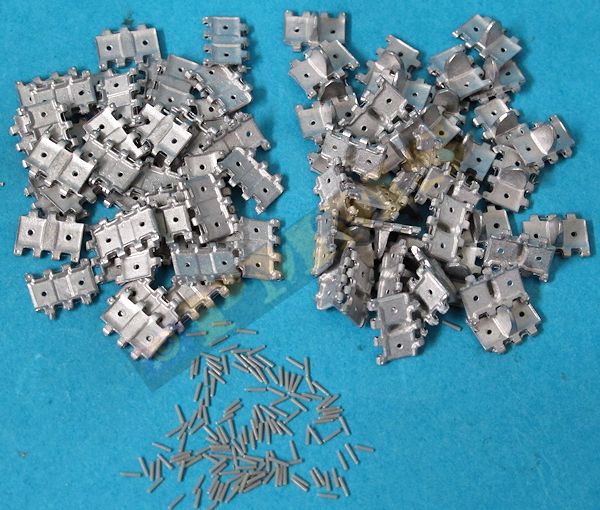
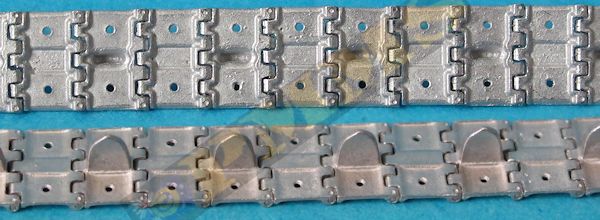
Close -up of links showing the small burs to be removed
and close-up of the two types of resin track pins provided.
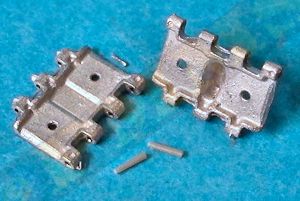
Each track link is cleanly cast with just a few small pour burs to be cleaned up and cast a little thinner than some contemporary links for a good scale appearance. The links detail while quite plain is very cleanly cast with the two outer holes fully open without any clean-up needed and the recess down the middle of the links has the subtle curve profile along the edges for a good appearance. The hollow on the face inside the guide horn is included although this could be a little deeper for better effect along with the raised edge around the link flange recesses very nicely depicted.
All the track pin holes are fully drilled out with only the occasional hole needing any further drilling and a notable feature of the links is the pin holes go all the way through the links allowing you to assemble to links using lengths of wire should you prefer this to the small resin pins provided. I found this feature very useful when joining the track runs ends together when fitting to the model as it does allow you to slip out the wire pin to take the track runs off the suspension if required at any time such as for painting.
Dimensionally the links match the width in the Tank Power plans perfectly although there is a very minor issue with the pitch (length) on the links being very fractionally short meaning you need to use 72 links to form the full track with the real vehicle using 70 links per track run. This minor 2 link difference over the full length of track is really insignificant and certainly is nothing to get excited about.
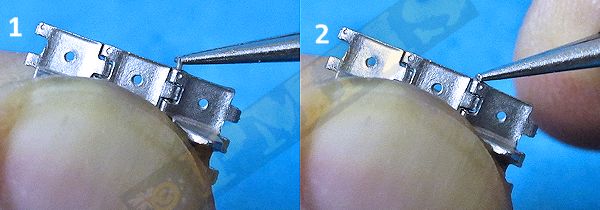
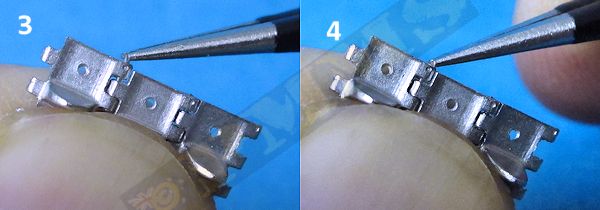
The most important thing when fitting the pins is to keep them at a perfect right angle and parallel with the links as you have to exert a bit of pressure to get the pins seated all the way into the holes so they won’t come out as no glue is used. I used the following assembly method and apart for the occasional hole that needed re-drilling and I had only a couple of pins snap off during assembly due to not having the pin perfectly square to the links.
First fit the two links (one with guide horn and one without) together and hold firmly with your fingers, then using a pair of stout needle point tweezers slip the pin into hole as far as it will go till it becomes tight (1) then use the tweezers or head of a small screwdriver to “push” the pins firmly into place until the head sits flush with the link (2). This is where it is important to exert the pushing pressure perfectly square with the links otherwise you will bend the resin pin and the only way out then is to extract or drill out the resin pin and start again with a fresh pin. You then rotate the track and repeat this for the other side of the link to secure the two links (3, 4)and then repeat this process for the full track run making sure you have the guide horn and flat links fitted alternately.
Assembled track runs.
The tracks runs assembled fairly quickly using this method but again I stress you must exert the downward pressure on the pin perfectly square as you push or you will have problems, but as there is only a little over 1mm of exposed pin needing to be pressed into the links there shouldn’t be problems if care is taken. The assembled track runs articulate freely and the pins hold in place very well without any glue.
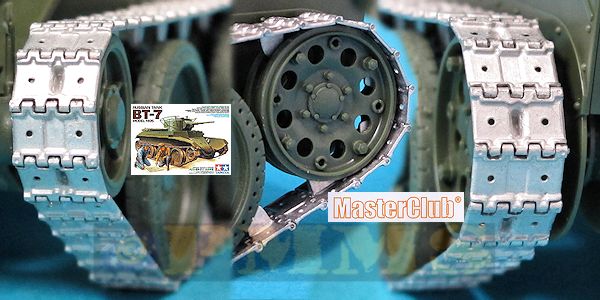
Test fitting the tracks to the earlier sprocket in kit #35309 sees the fit not 100% but you can force the guide teeth into the sprockets but they still don’t sit perfectly even around the sprocket. The main issue here is the later short metal links weren’t used with the early sprocket in the kit, so if you wish to use these on the first kit #35309 you will need to update the sprocket.
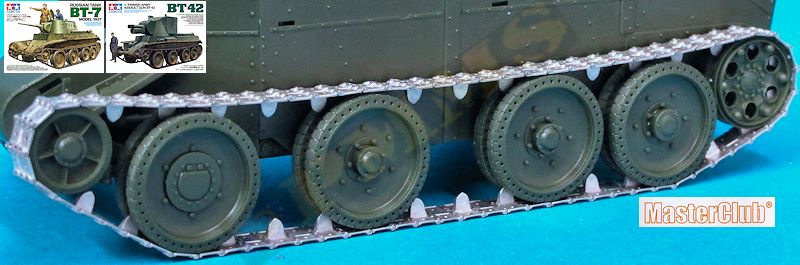
The fit to the later sprockets in kit #35318 and #35327 sees a perfect fit without any other issues other than having to reposition the front idler axle/wheel to get the most appropriate top run track sag over the running wheels, which is easily done.
Test fitted to the first Tamiya BT-7 kit #35309 with the early drive sprockets
This is not the correct combination but shown for reference.
Tracks fitted to the Tamiya kits #35318, 35327 that have to later appropriate drive sprocket.
The assembled track runs articulate well and fit easily to the Tamiya BT-7/42 kit used in the review and are a great improvement over the plastic link and length kit tracks for added detail definition.
Rating 9/10
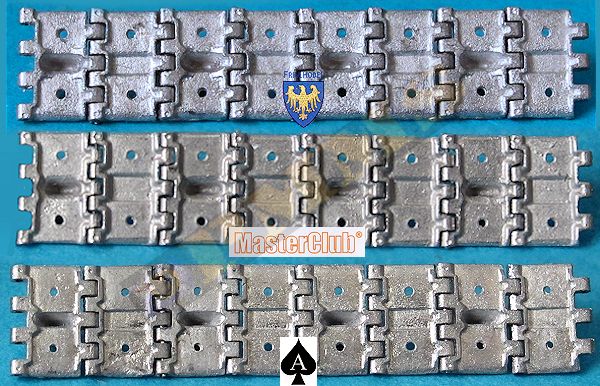
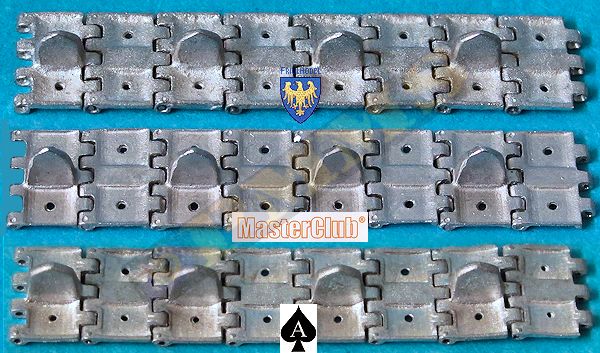
Fruilmodel:
Detail wise the Fruil tracks are dimensionally the same as the MasterClub links but are a little thinker and have a distinct cast texture on the link faces which isn’t apparent when looking at photos of the actual track which is quite smooth as depicted in the MasterClub and Spade Ace links. The central recess has the curved edge profile as they should but the raised ridges around the link segments isn’t as well defined as on the MasterClub links while the indentation inside the guide horn is about the same depth as on the MasterClub tracks.
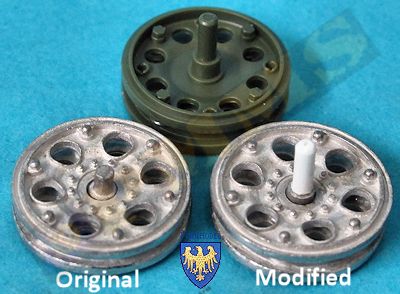
The links only have some minor clean-up of small casting burs and all the holes on the 30 or so links I assembled for the review didn’t need the pin holes drilled out. Assembly is the traditional Fruil method of cutting the supplied wire into 7mm segments and once slipped into place joining the links is secured with a dab of thicker cyanoacrylate. The Fruils also come with two replacement late style drive sprockets applicable to the shorter links in the set and if you want to use these on the Tamiya but the small locating axle pin will need to be replaced with the thicker pin to fit into the final drives on the Tamiya kits. The Fruil sprockets are not as well detailed as the later Tamiya sprockets in any case so you are better off using the kit sprockets unless using the links on the first Tamiya kit #35309 which requires a sprocket update to use the smaller 70 link tracks.
The fit of the Fruil tracks to the Tamiya drive sprockets is very snug and again being the same dimensions as the MasterClub tracks will need the idlers repositioned slightly for the appropriate track sag. The tracks obviously fit to the Fruil sprockets without any problems if you decide to use these?
Spade Ace:
Dimensionally these links are a little longer in pitch but not by a lot but the details are very basic with the central recess having square edges and not the curved profile of the actual links and as depicted correctly on both the Fruil and MsterClub links. The outside guide horn indentation is a little deeper than on the other two but overall don’t have the visual finesse of the other two brands.
The links only have some minor clean-up of small casting burs and all the holes on the 30 or so links I assembled for the review didn’t need the pin holes drilled out. Spade Ace still insist on suppling the industrial grade wire which is all but impossible to work with (cut or straighten) using normal modelling tools and replacing this with softer wire is the best thing, you then cut the wire into 7mm lengths and assemble in the same manner as the others securing the pins with a dab of thicker cyanoacrylate as you go.
The fit around the Tamiya kit sprocket is very snug and the idler again will need to be adjusted in position slightly to get the correct top run track sag.
The comparison conclusion IMHO sees the MasterClub the best of the three with better defined details and appearance due to the slightly thinner links, the smooth link finish and the round link pin heads from the use of the resin link pins. The resin pins do require a little more care during assembly but with care are fairly easy to assemble with the wire pin method available as a back drop if needed.
The Fruils are a close second but the rough finish on the links and details not having the finesse of the MasterClub links as well as the wire not giving any end pin detail see them pipped at the post as it were. The Spade Ace links are a long last due the poor rendition of the link details in comparison and the fact you need to supply your own wire to assembly the links.
Outer face details.
Inner face details.
Modifications to the Fruil drive sprocket if you wish to use this on the Tamiya BT-7 kits.
Fruilmodel tracks test fitted to the Tamiya BT-7 kits as above.
MasterCl;ub tracks test fitted to the Tamiya BT-7 kits as above.
Spade Ace tracks test fitted to the Tamiya BT-7 kits as above.
| BT Tank Power Vol.CIV Wydawnictwo Militaria No.352 ISBN: 9788372193520  |
