
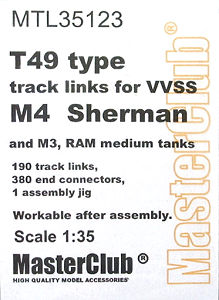
T49 type track links for VVSS M4 Sherman,
M3 and RAM medium tanks
MasterClub 1:35 Scale Set # MTL35123
Review by Terry Ashley

Resin assembly jig
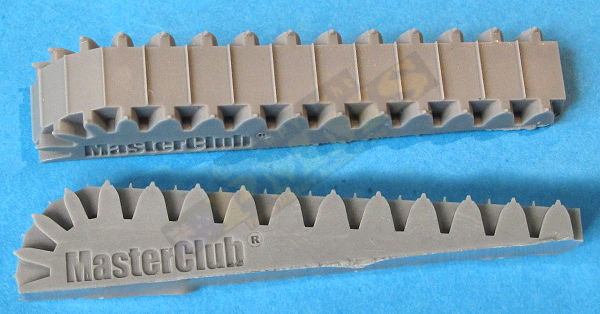
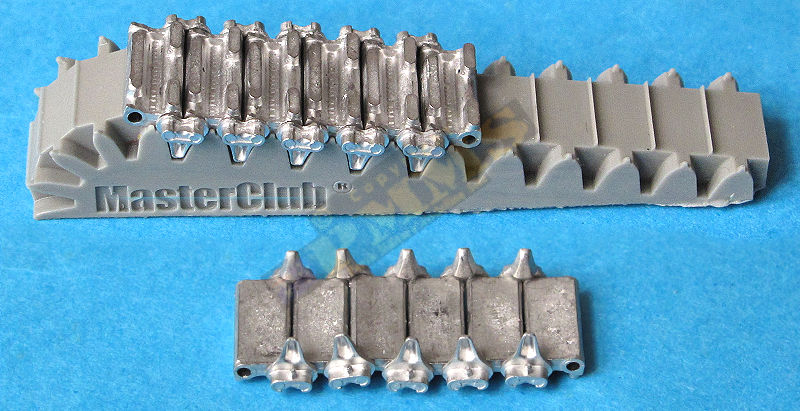
Each track link is cleanly cast with just a single small pour bur to be trimmed from some links while others required little or no clean-up, the end connectors didn't require any clean-up with all the connector pin holes in the links being cleanly drilled out.
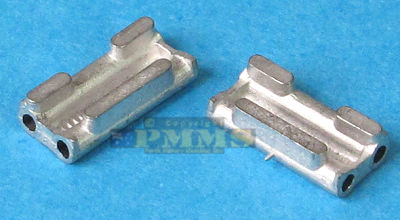
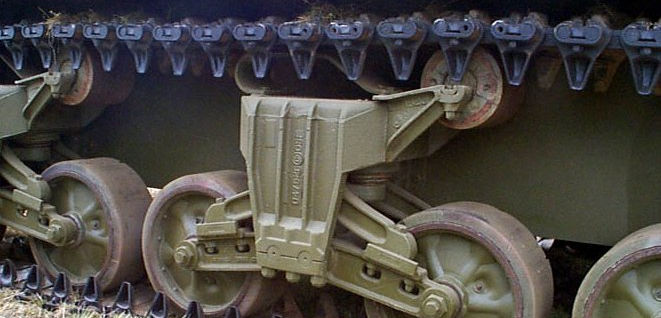
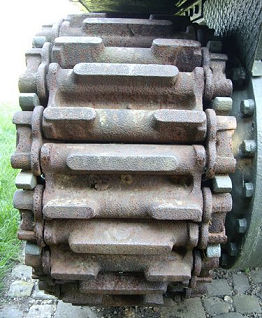
The detail on the links is excellent overall with the cleanly cast details including a weld seam on these links and the end connectors are also cleanly cast with a nicely defined retaining bolt and track guide. A point to note, many types of Sherman track have holes in the ends of the track pins but images of T49 track I've seen have these holes mostly capped with just the odd pin showing the holes (see images). The MasterClub T49 end pins are without the holes which represents this.
Reference image of T49 track with mostly capped holes in the end connectors.
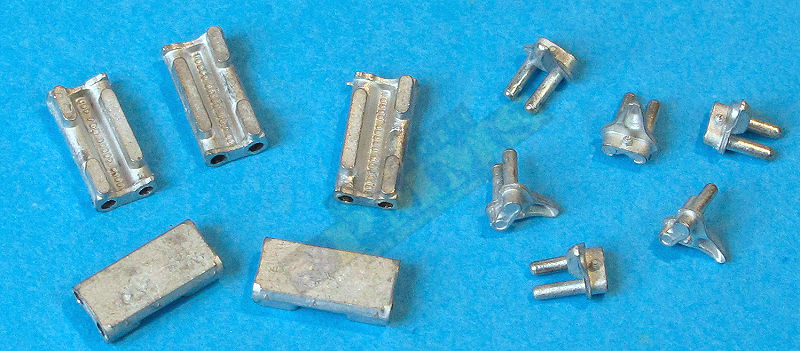
Each end connector has two short pins designed to fit into the corresponding holes in the links using the assembly jig to make the assembly as easy as possible. The instructions included with the set show to glue (with cyanoacrylate) one of the pins only as you fit this in place to hold the end connectors in position, you must ensure you glue the pin to the same link hole either side to allow the other pin and link to free to move. The end connector pins won't hold in place without glue as they simply fall out when you handle the track runs.
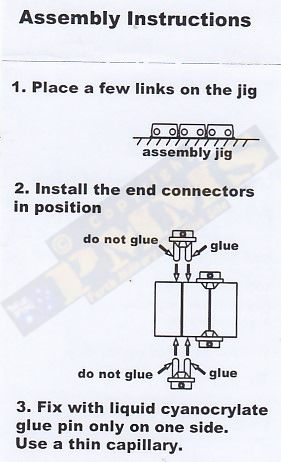
While this secures the end connector it does negate the "workability" in the true sense as one end connector and link will always be aligned level and won't sit perfectly around the drive sprocket and idler, you will need to use the curved end section of the jig to assembly the end connectors at the correct angle to sit truly around the sprockets, idlers and first and last road wheels.
You will need to determine the proper number of links between the curved sections which the instructions don't indicate and also may vary between different makers kits although it shouldn't if they have the suspension done accurately.
I put a small dab of glue in the same hole on each link as mentioned and as the thinker glue gives a little working time I put a dab in the five appropriate holes at once and then added the five end connectors to make a section of six links, then repeat for more links.

Five links with the end connectors glued at an angle was sufficient for around the drive sprocket and I suspect the idler also but I didn't get that far for this exercise with four straight links between the sprocket and first road wheel with just two angled end connectors for around the first and last road wheel.
It's best to fit the tracks to your kit suspension is sections and by adding an end connector on one side only where the sections join makes the job of mating the track sections a lot easier as you don't have to juggle an end connector to line them up.
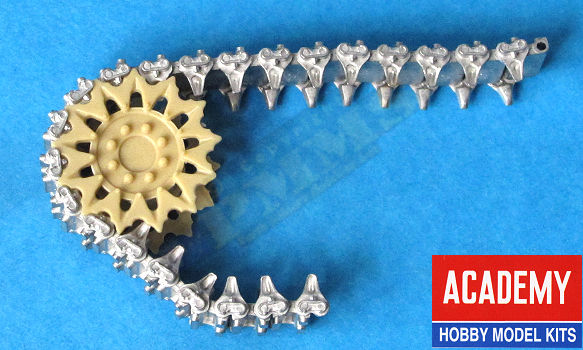
With Academy the fit to the drive sprockets from an M3 Grant kit was perfect and as the same parts (abate different style sprockets) are used in most of their M3/M4 kits these should all be no problems.
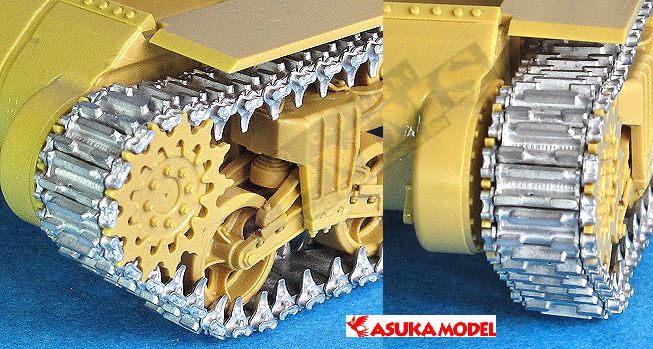
The fit to the Asuka/Taska drive sprocket was excellent as it was around the road wheels and Idler so nothing more to be said here.
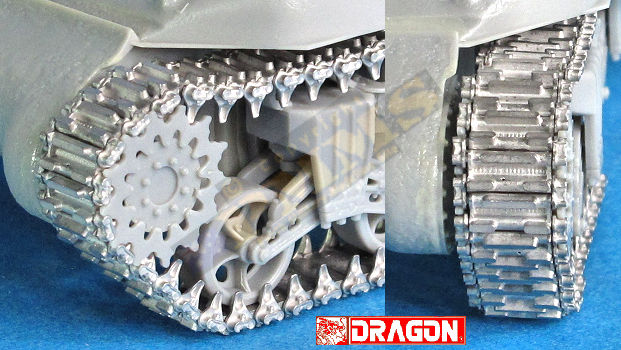
The fit to the sample Dragon sprocket was a little tight but still fitted okay after a little nudging to get the track in place, the fit to the rest of the suspension was all okay.
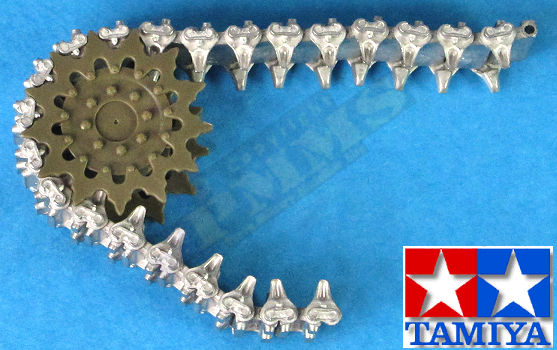
On the Tamiya kits I tested the older M4A3 and the tracks simply would not fit the sprockets as the thickness of the tooth sprockets was way too thick, but on the new M10 the fit was perfect, as good as with the Asuka sprockets.
Assembled tracks test fitted to a Asuka kit.
Assembled tracks test fitted to a Dragon kit.
Assembled tracks test fitted to the Tamiya M10 kit sprockets.
Reference image of the T49 track.
The assembly method of gluing one pin of the end connectors to the links leaving the other free to move does compromise and limit the full movement of the assembled links meaning you need to assemble the end connectors for the links around the sprockets and idlers at the appropriate angle using the jig provided and the remainder straight for the longer sections of track. But unless you intend to play broom brooms on the carpet this should work out okay?
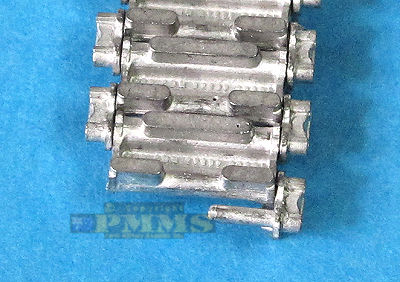
The detail and appearance of the assembled track runs is excellent with the separate end connectors adding good detail definition compared to some with the end connectors moulded to the links themselves and painting should bring out the detail nicely, they also add a degree of weight to the model which should help the sit on those kits with working suspension as well as giving it a bulkier feel.
Overall a very nicely detailed set of M4 T49 track the only real reservation being the care needed to get the angled end connectors around the sprockets and idlers but other than this these should add nicely to appearance of any kit they are used on.Rating 8.5/10
Thanks to my credit card and
Please to help the reviews continue, thank you
