

Pickup w/ZU-23-2
Meng Model 1:35 Scale Kit #VS-004
Review by Terry Ashley


The earlier 40 series, the 70 series (as depicted in this kit) and later 80 series (in the current Syrian civil war) appear to be the most commonly used versions of the Land Cruiser with many having some real way-out camouflage paint schemes applied by their owners. The Toyota J75 Land Cruiser Series built was between 1984 and 2007.
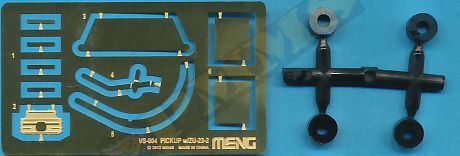
The kit consists of a total of 202 plastic parts on 9 sprues plus 10 PE parts, these are broken down as:
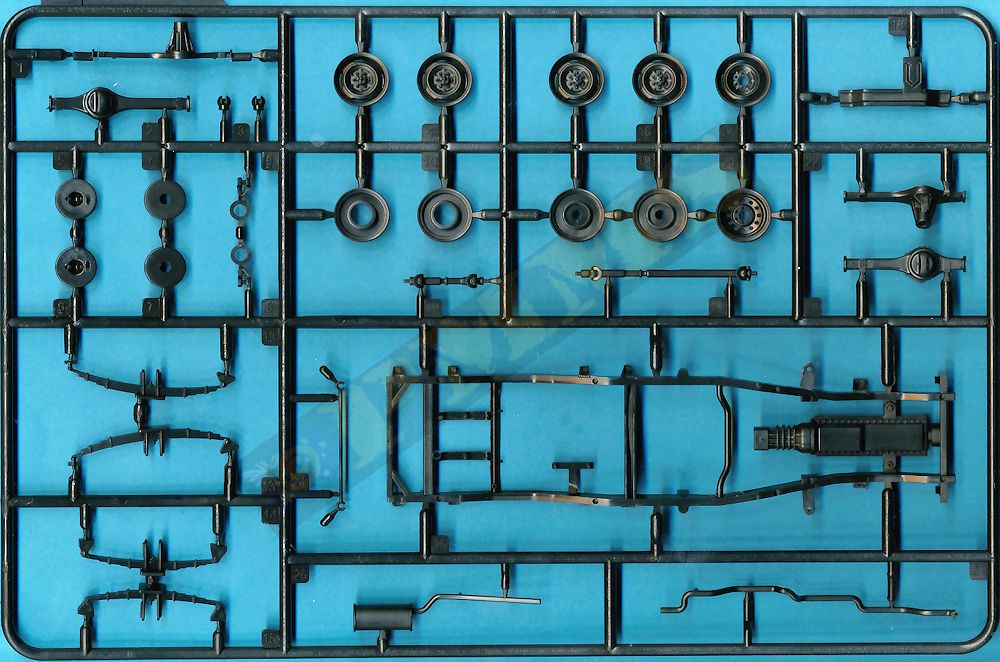
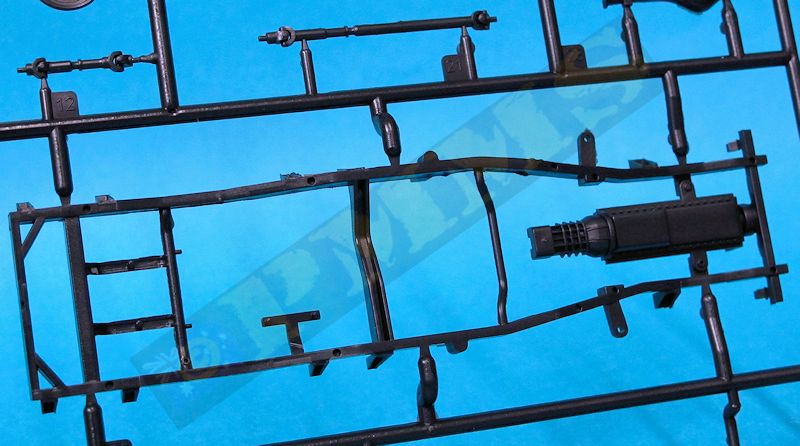
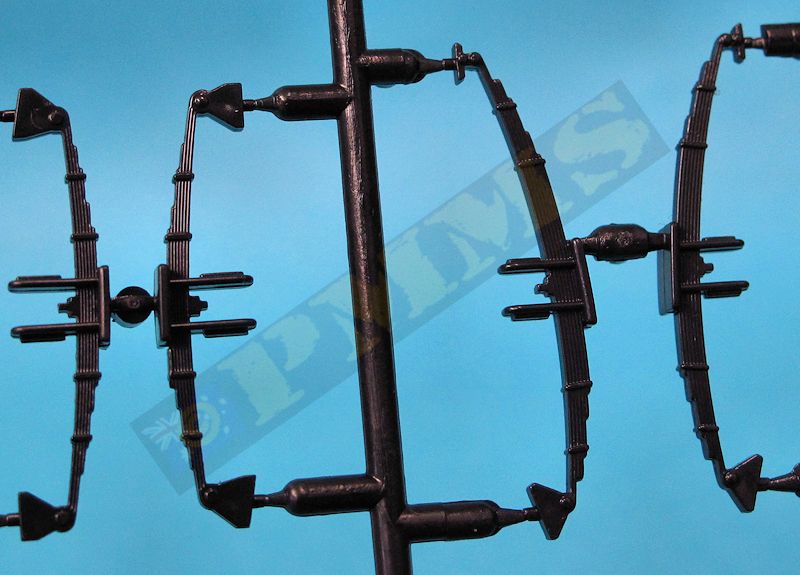
- 33 black plastic parts for the chassis and suspension
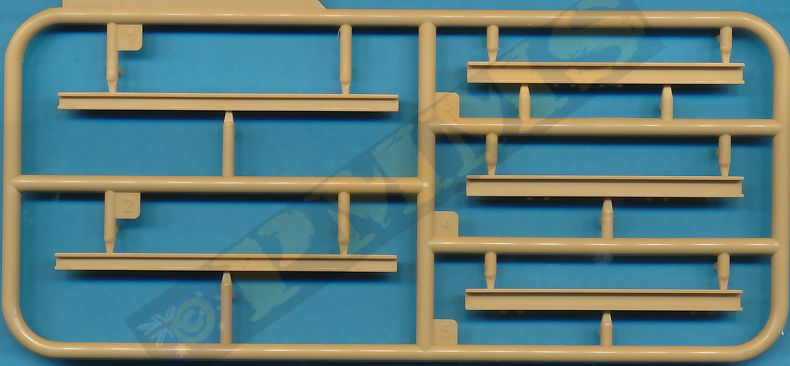
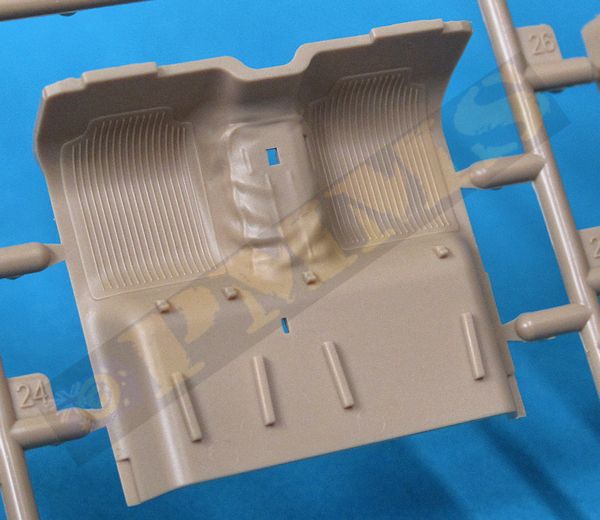
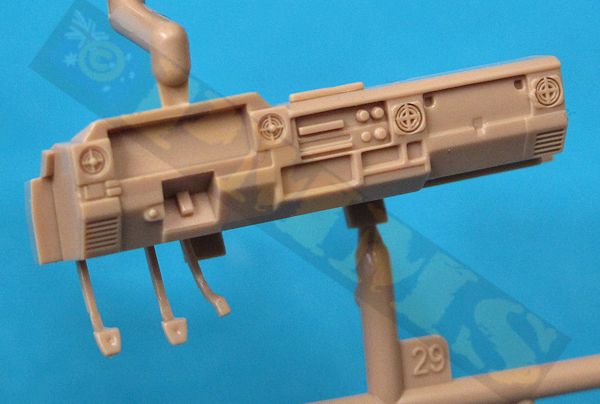
- 58 tan plastic parts for the pickup
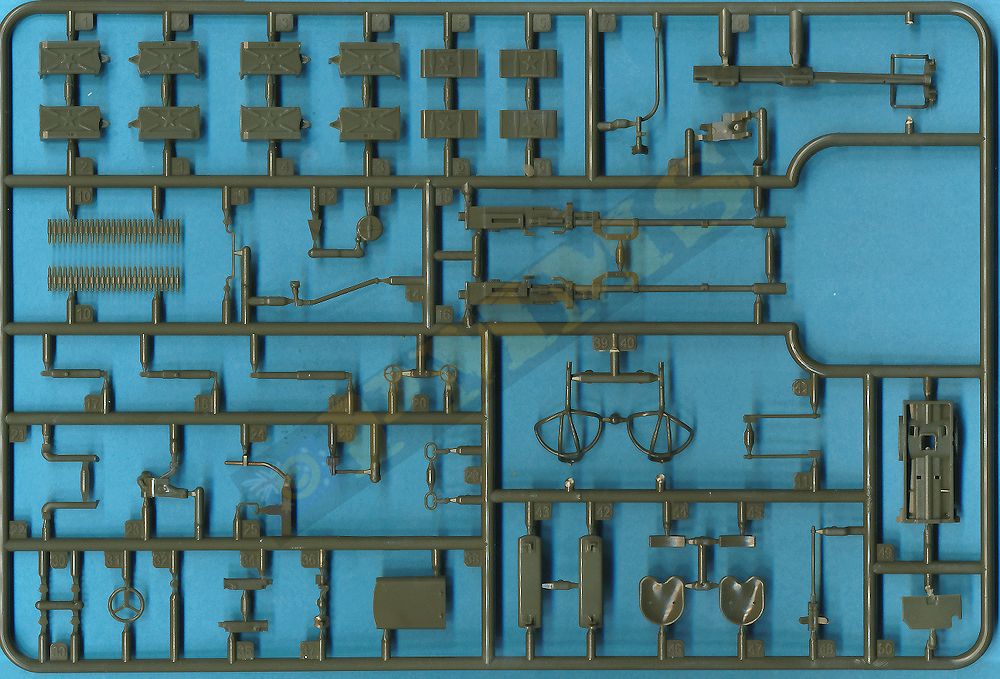
- 101 dark green plastic parts for the ZU-2-3-2
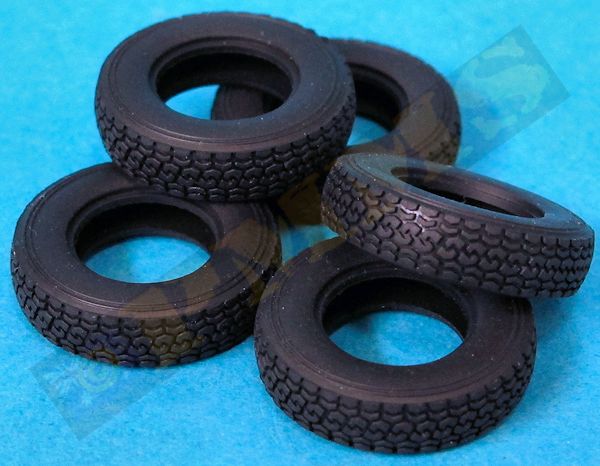
- 5 black vinyl tyres
- 1 small decal sheet
- 18 page A5 sized instruction booklet in colour

The standard of moulding is excellent overall with clean crisp detail and virtually no pin marks that would be visible after assembly, there is just the odd bit of fine flash on some of the finer parts but other than that moulded extremely clean. The black plastic used for the chassis and suspension is a little softer and has a little more flash than the tan plastic used for the body parts so additional care will be needed working with this. You may also need to give some parts a bath is detergent water as there is a little mould release still on the parts.
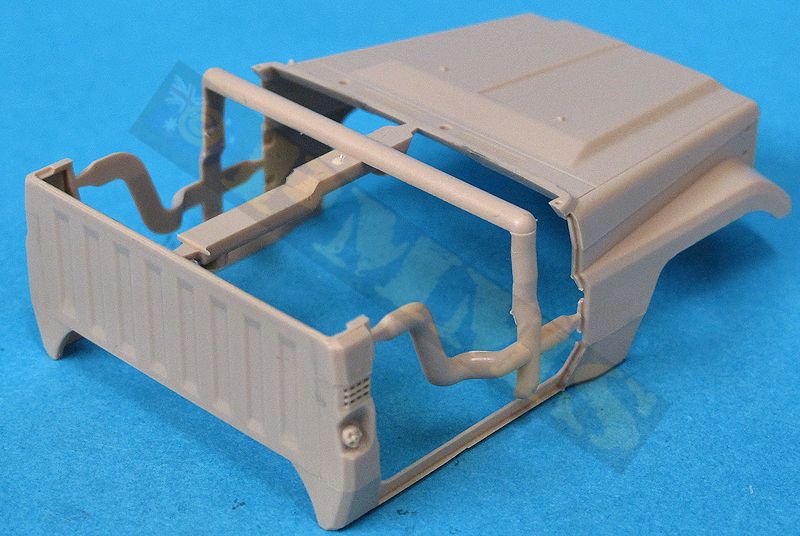
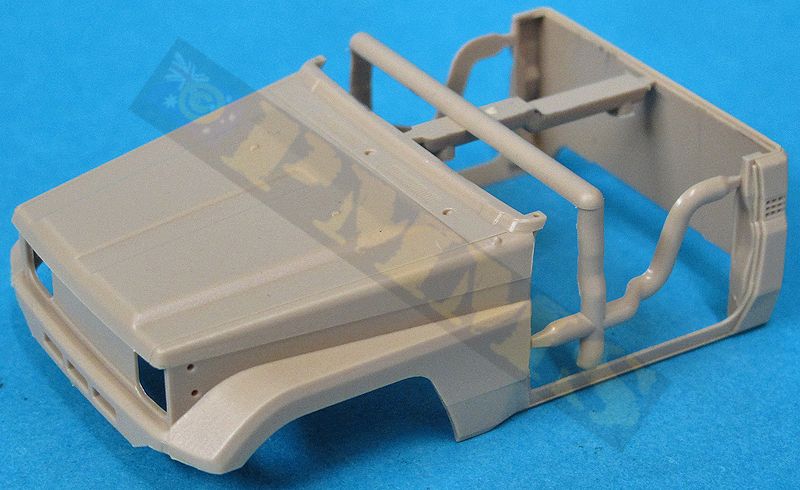
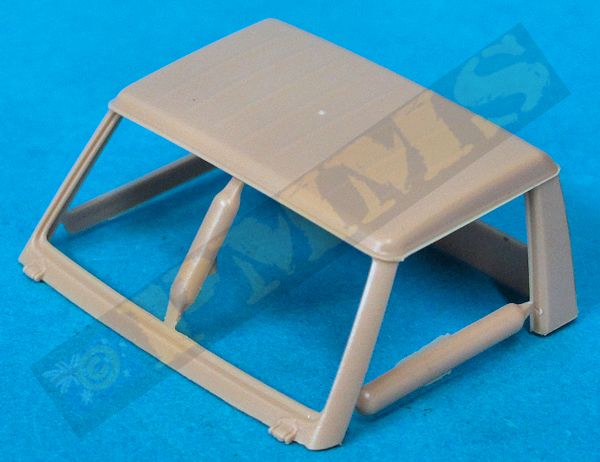
The kit is designed more along the lines of military vehicle kits as opposed the civilian model design of the Pickup w/ZPU-1 with it having separate doors and windows that you can position the doors open if you wish in a diorama setting, the windscreen is also a separate part .An interesting feature of the kit is the cab roof is moulded separately from main body this would allow you to build the model “topless” as it has appeared in some available photos.
The full chassis including just the underside of the engine and gearbox is moulded in one piece thus ensuring there is a perfectly square basis for the kit with the front and rear differentials and leaf springs added plus the drive shafts and shock absorbers. The central transfer case is made up of two parts with this and the rear mounted fuel tank along with two part exhaust pipe and muffler making up what is a fairly simple sub-assembly.
Construction notes:
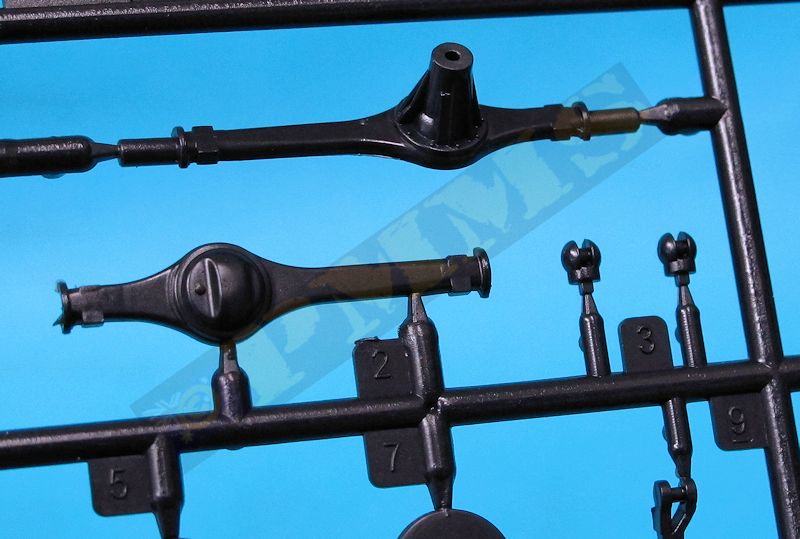
There are no problems assembling the chassis and suspension with just the mould lines to be removed from the parts before assembly, the fit is very good with nice positive locating points for the leaf springs and axles. The only issue is the front wheel steering assemblies as the instructions have it all wrong. See below.
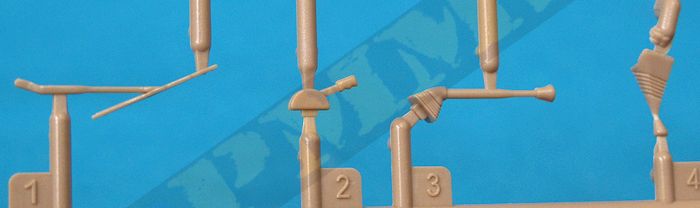
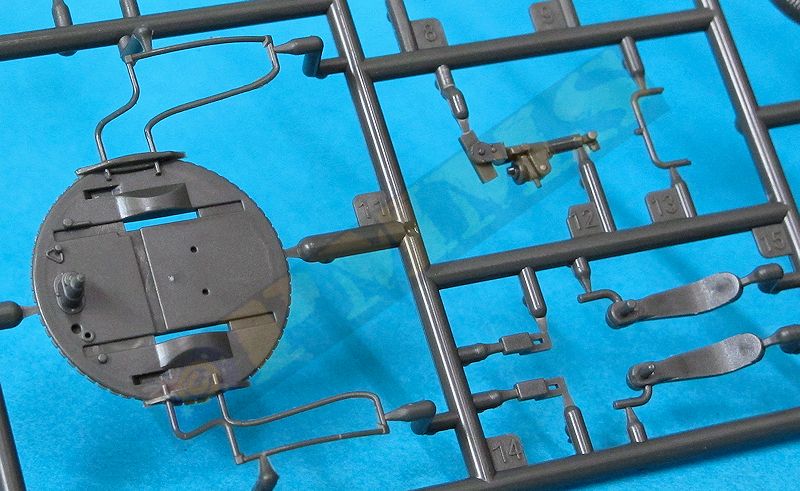
The front wheels can be made steerable by way of two small ball sockets on the ends of the front axle, this will allow you to position the wheels for a little animation if you wish but the instructions are a little vague on this and don’t show the proper way to put the front wheel/steering assembly together, but more on this in the construction update.
Construction notes:
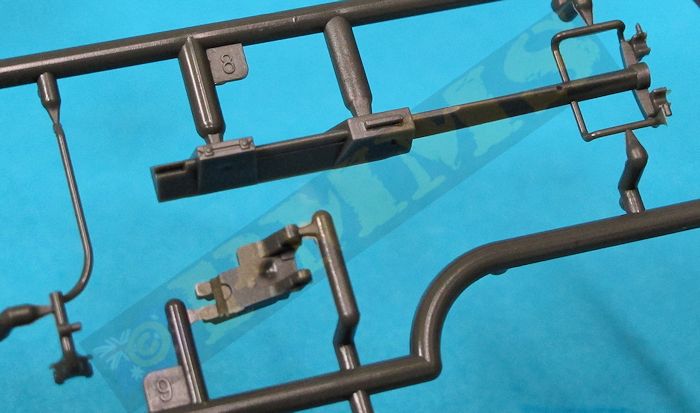
Unfortunately the way the instructions show to assemble the steering/wheel hubs simply won’t work, the main issue is they show to glue the parts B8, B9 to the wheel hubs (parts B5, B6) and then slip these assemblies over the ball sockets on the end of the axles. But the opening in the parts B8, B9 will not fit over the ball sockets (parts B3) as they are supposed to trap the ball socket in the hub to allow the wheel to steer.
If you don’t want to worry about having the front wheels steerable you can simply enlarge the opening in parts B8, B9 and glue these in place over the ball sockets but if you want the wheels steerable the assembly is different.
First before gluing the ball sockets to the axles you need to slip the ball sockets through parts B8, B9 and glue the ball sockets to the axles with parts B8, B9 swinging free at this stage taking care not to get any glue on B8, B9 as you glue the ball sockets to the axles, also note the orientation of the groove in the ball sockets as shown in the instructions.
Next you need to fit the wheel hugs onto the ball sockets aligning the hubs with the groves in the ball sockets and glue the hubs to part B8, B9 taking care not to get glue onto the ball sockets in the process, care is needed here as there is not a clearance between the parts so use the glue very sparingly. Once the glue has dried you should be able the move the wheel hugs which are linked by the steering arm (part B24).
With this done the rest of the assembly is straightforward as per the instructions, but again if you don’t want the wheels steerable simply glue the hub assembly over the ball sockets at the desired wheel angle.The wheel rims are in two halves each with a vinyl poly cap trapped between them to allow easy fitting to the axles, the rims are standard steel rims and the vinyl tyres have a nicely defined ‘generic’ civilian tread pattern but without any sidewall embossing or other ‘corporate’ detail, as with the first pickup kit I presume there will be various aftermarket resin wheels produced for this kit?
Construction notes:
Again no problems with the wheel assembly and these fit easily to the axles by way of the poly caps trapped between the wheel halves.
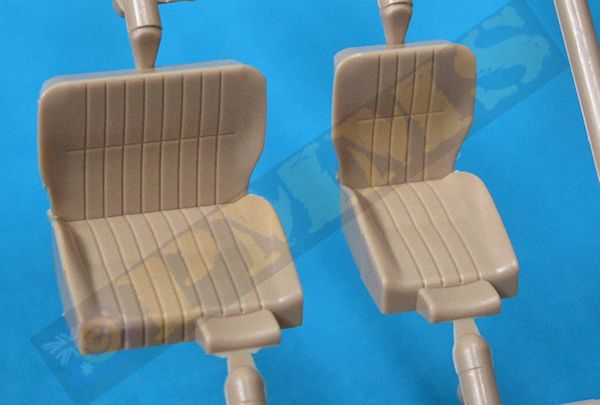
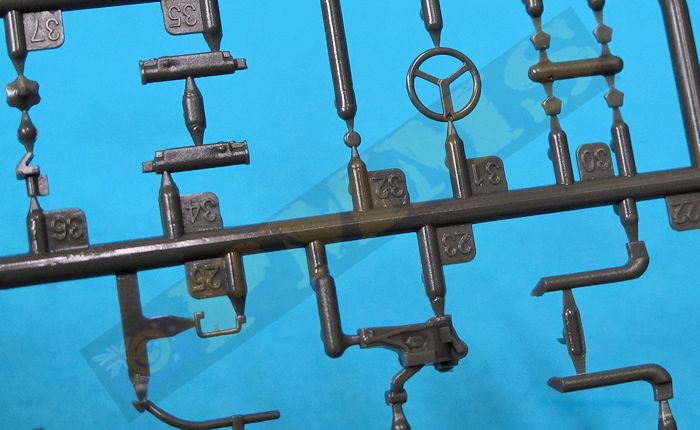
The interior is very nicely detailed with left hand drive for the console and instruments with the only decals in the kit being for the instrument dials. The steering column and steering wheel are separate parts with the interior detail matching very well with images of the 1990 HZJ75P 2-door Pick-up as mentioned above. The foot pedals are attached to the underside of the console with the separate gear levers and the hand brake plus nicely done seats although there are no seat belts which can be added from any medium you prefer. The rear view mirror and separate sun visors are provided for the roof interior and separate wheel wells and fuel tank for under the floor.
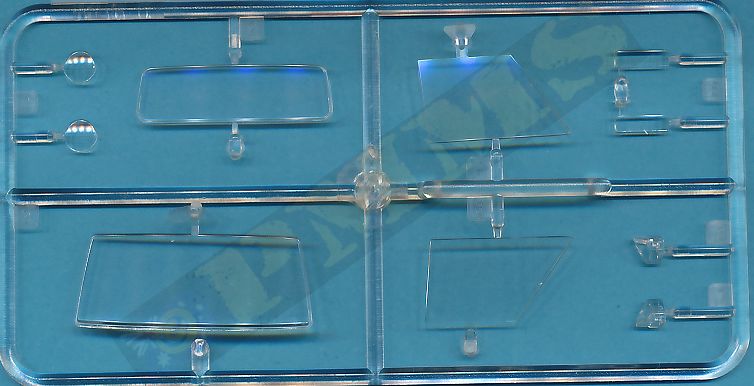
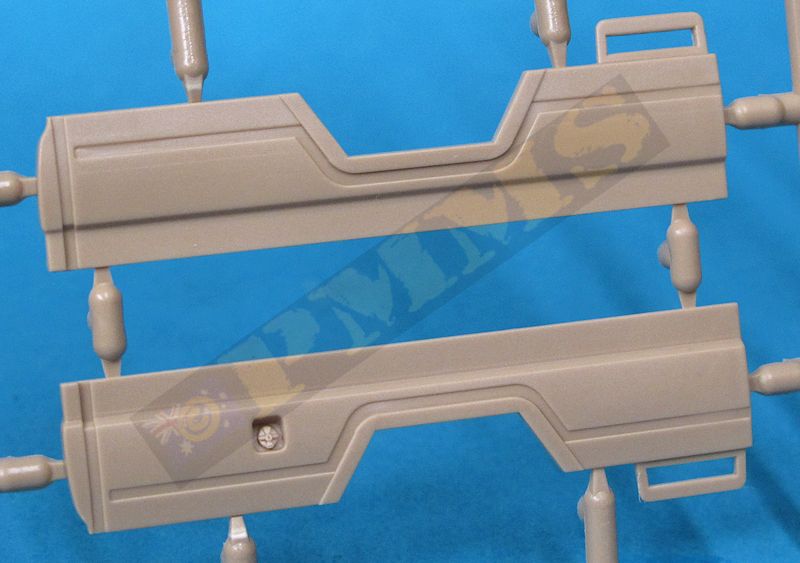
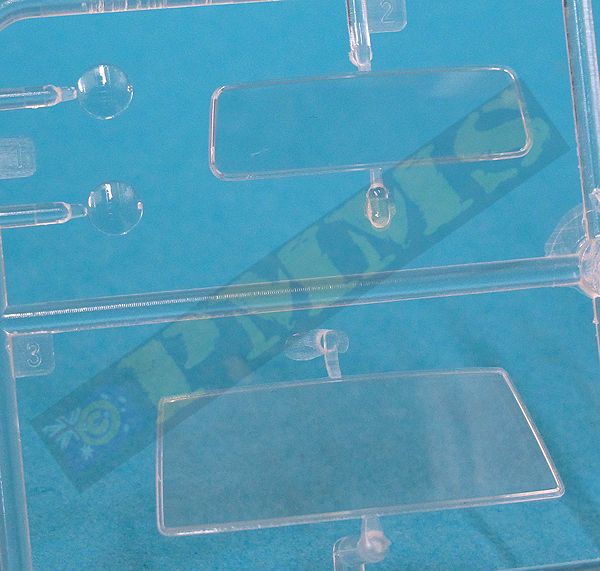
The exterior body contours are very nicely done with just the front grill with clear head lights and clear side lights added plus the fine windscreen wipers to be added, as you would expect there are no “Toyota” or “Land Cruiser” badges supplied with the kit thanks to the greedy corporate lawyers that seem to be everywhere these days. Hopefully these will come from aftermarket producers to give some identity to the kit?
The separate doors have separate inner linings with the side mirrors also separate, the clear windows are in one piece that include the front quarter window so if you wanted to show the windows open a bit of trimming will be needed.
Construction notes:
The fit of all the body parts is very good and went together well with only two minor issues, firstly the front wheel wells (parts A16, A17), these needed the outer edges thinned slightly so they would sit flush with the body wheel well contours, this is easily done with test fitted to see how much needs to be trimmed from the wheel wells. The second is the doors don’t fit 100% in the closed position and some minor trimming will be needed, if you’re showing the doors open this is not a problem and you just glue to doors at the desired angle. Obviously you would paint the interior tub before fitting inside the body and apply the instrument decals.
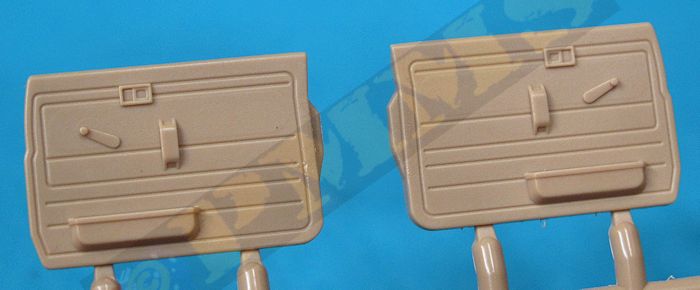
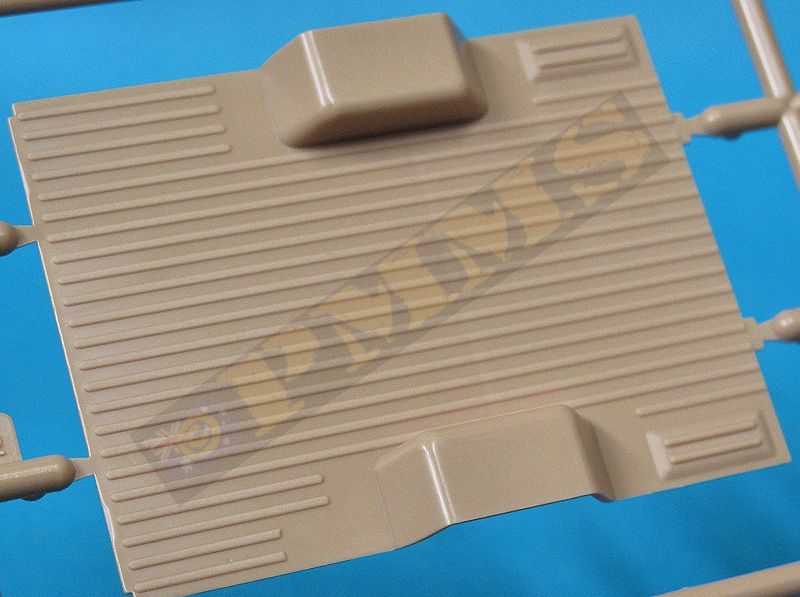
The rear cargo tray is also a fairly simple sub-assembly with the floor that includes ribbing and the wheel wells plus separate front, sides and rear tailgate, both the sides and tailgate have separate top sills with the tie down hooks for nice detail plus a separate rear bumper with separate clear tail lights. Added under the body are the side steps, front bumper bar and rear mud flaps.
Construction notes:
There were no assembly problems here with the parts fitting together precisely, the only issue is there are joins along the inside of the side and tailgate sills that need to be filled, a very straightforward task as there is other detail to get in the way while sanding the joins. The tailgate is designed to open or close so this can be fitted as you wish
The final fitting of the cab and rear tray to the chassis is again very good with very precise locating lugs and pins to hold everything in place correctly, the cab and rear tray are actually not glued to the chassis in the assembly images showing the good fit of the parts.
This builds easily into a very nice model of the 1990 Toyota HZJ75P 2-door Pick-up with excellent detail and very good fit of the parts overall, the only real issue being the front wheel steering. The finished model can be painted in many colour variations and you can add extra parts like bull bars etc. as you wish, the most obvious thing about the kit is the absence of the “Toyota” and “Land Cruiser” badges which gives a very sterile look to the kit.
Click on thumbnails for larger view
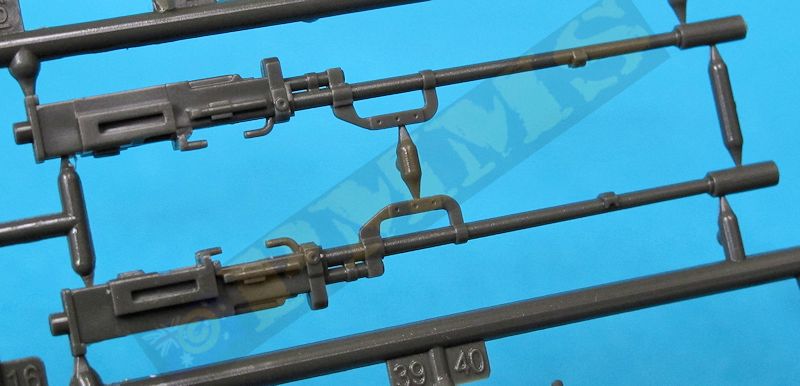
This is a kit within a kit and is very detailed with many finely detailed parts, the two 23mm guns have the large flash suppressor hollowed out and the gun mounting can be assembled at three points of elevation, zero degrees, about thirty degrees and seventy degrees elevation, the chosen elevations are fixed as there are three different length hydraulic elevation cylinders applicable to the selected elevation.
The main sight is made up of nine plastic and one etched part and matches photos of the actual sight well with the long rod linkage from the sight to the guns to allow the sight and guns to sit at the correct angle depending on the elevation. The two crew seats have the fine rod frame with metal seat added for a good representation of the seats. The large ammo boxes have the embossed star of the original with two lengths of 23mm ammo belts to fit between the boxes and the guns again for a very good appearance.
The assembled gun mounting and seats fit the lower turntable which has very fine support frames for the wheel mudguards and these need care removing for the sprues with the ammo box assemblies fitting to the side of the gun mounting. The gunner’s foot pedals are also separate parts with some additional small linkages and etched parts added one the guns are fitted to the turntable.
The lower carriage is also nicely done with numerous small details including the folding tow hitch, small lights and other smaller details. To fit the turntable to the carriage gun ring there are two small brackets glued into place once the turntable and carriage are mated so you can’t take these apart again afterwards so it’s best to leave this step till last. Note there are the three round undersides saw tooth “feet” that are only fitted if you are building the gun as a standalone ground mounting, these aren’t attached when mounted on the pickup.
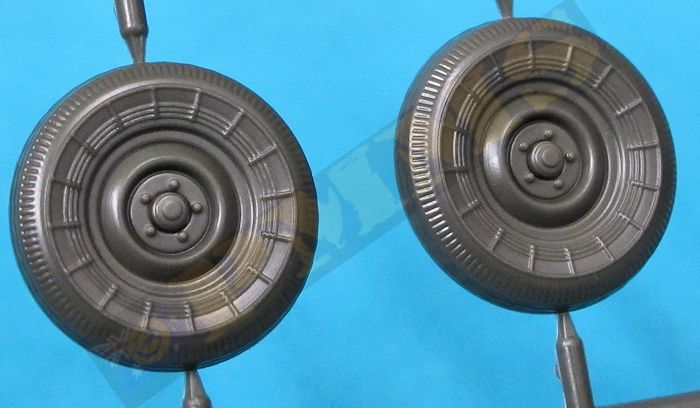
The kit also has the carriage wheels in two halves with nice tyre tread and sidewall detail along with alternate axle arms depending if you build the gun with the wheels in the transport or firing positions, or you leave the wheels off altogether as seen in numerous photos of the gun mounted onto the backs of pickups or trucks. There are also numerous shots available showing the wheels still fitted in the raised firing position while on the pickup, so you have a choice here.
The gun is mounted on the pickup rear by way of five short sections of H beam welded together; these mountings were basically custom made for each installation so can vary with this just one of the possibilities.
Construction notes:
The parts have a little more flash and mould release than those for the pickup and care is needed removing the many small fine parts from the sprues, there are also the mould lines some of which will need care cleaning up as they are substantial in relation to the part size in some cases. Just a quick mention of the very fine wheel fender mountings rod attached to the turntable, these are very thin and require great care removing from the sprue as you separate the turntable to avoid damage and also when cleaning the fine mould lines
I don’t have any reliable 1:35 plans of the gun but the built kit matches the stated length and width dimensions quite well using just a steel ruler to make basic measurements, not the most scientific but shows the kit to be on track as far as overall dimensions go.
The gun has a few options available such as the elevation position mentioned above and the final configuration of the gun either mounted on the pickup or as a stand-alone in either firing or travel configurations but you have to make a choice here as none are movable and I have made some minor alterations to allow the sight and sight arm to move in unison with the gun elevation.
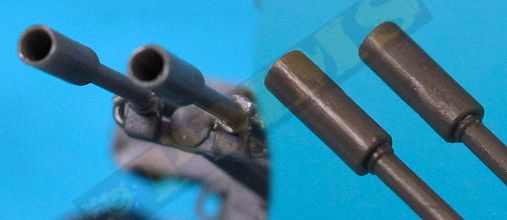
The main gun carriage assembly is straightforward with the guns having the large flash suppressors hollowed out to about half their depth, this gives a good impression but means the small openings around the rear of the suppressors are not there.
As mentioned you get three alternate elevation cylinders of different lengths depending on your choice of elevation. As I decided to have the guns elevate I modified the sight/sight arms accordingly and glued the shortest cylinder (part H17) firmly in place so it stopped the gun in the correct zero elevation position. This means the cylinder remains in that position when you elevate the guns and with a little work you could make a replacement working cylinder from tube and rod but I had progressed past this point of construction before noticing this could be done so stayed with just gluing the short cylinder for now.
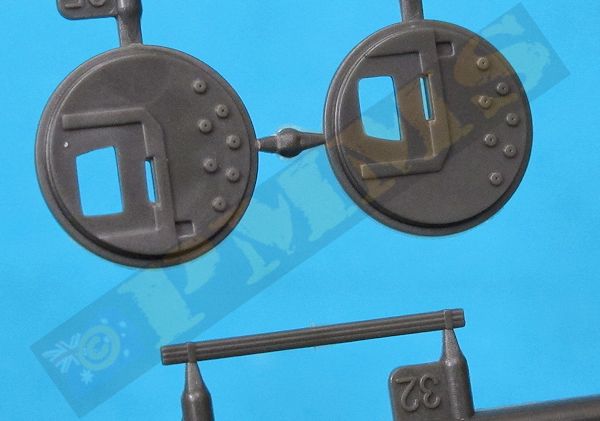
When gluing the two round trunnion discs (parts G34, G35) to the gun mounting you must ensure these are perfectly vertical and parallel with the mounting as there is scope for movement and it’s important these are aligned correctly so they sit inside the larger trunnion rings (part G17, G18) correctly. It’s better to glue these discs to the gun mounting before adding the side trunnion rings and rear plate as it gives less parts to align while completing the sub-assembly which then fits easily to the turntable without any problems. Just a quick note on the lower etched bracket (part PE-3) this should in fact pivot to remain level as the guns elevate but I just left this glued in the zero elevation position for this build.
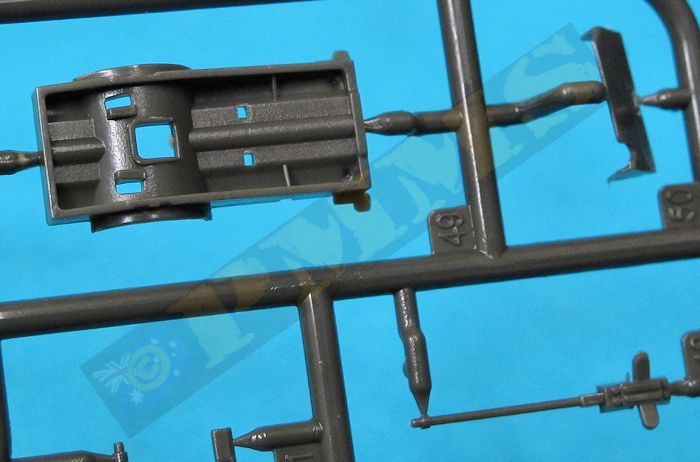
The three part ammo boxes have nice surface embossing but there is a large join to be eliminated which is quite tricky due to the detail on the ends of the boxes, the ammo box sits into its cradle which is then attached to the side of the gun mounting. You also get two additional ammo boxes and two short lengths of 23mm ammo to use as required on the vehicle or in a diorama. The footplates for the gunner and loader are attached to the base along with the separate gunner’s foot pedals and large hand wheel on the left side of the gun mounting and one centrally at the rear of the turntable, this has a separate hand ‘knob’ that is very small and slippery requiring care in handling
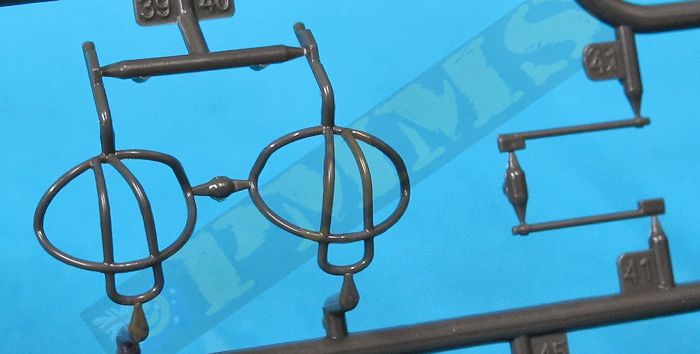
The two crew seats have the frames moulded in one piece but due to the complexity of the frames the rods are not perfectly round and even less so after you clean off the quite substantial mould lines on the seat frames. The steel seats and backrest fit to the frames along with four small ‘star’ hand nuts on the base with the seat assemblies fitting easily to the recess in the turntable base. The two wheel fenders also fit easily to the thin rod mountings but again take care as the rods are very thin and fragile.
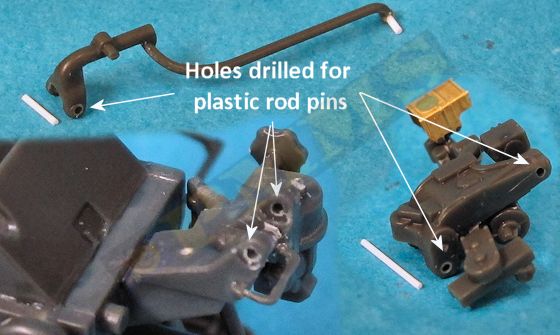
The sight base and sight are multi-part assemblies with some very small parts and most needed cleaning up as these seemed to have more than their fair share of fine flash on the parts, the sight optics have an etched hood for nice detail and I also modified these parts to allow the sight assembly to elevate along with the guns as mentioned. This entailed drilling small holes through the sight and the corresponding mountings to allow the 0.5mm plastic rod pins to be inserted making the joins movable. This was actually quite easily done as the sight mountings and sight arm brackets were large enough to allow the 0.5mm holes without damaging the parts. (see images).
2. Glue a short pin to the end of the sight arm to go into the hole drilled in its mounting (Part H12 not shown)
3. Fit the sights and sight arm together holding in place by the plastic rod pins to allow full movement.
Note: this is optional and you just glue the sight and arm together as per instructions if you
don't want to alter the gun elevation after assembly.
Main sight and sight arm fitted together with plastic rod pin prior to fitting to the gun mounting.
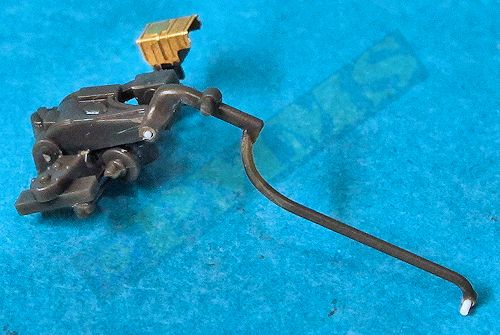
The main sight and arm can then be fitted together to the gun mounting and then moves in unison with the gun elevation as on the real gun. If you do not wish to animate the sights as above you can simply glue the sight and sight arm into position corresponding to your chosen gun elevation for an easier assembly as per the instructions.
The large gun base is in one piece with the central gun ring open plus a separate front towing arm, I again drilled holes and inserted a small plastic rod pin to allow the arm to fold back when not in the extended mode but again this is up to the individual and just gluing the arm in place would suffice.
The smaller details are easily added to the base but don’t fit the three saw tooth “feet” if mounting the gun onto the pickup tray, the assembled gun turntable fits into the base opening with two small brackets (parts G14) glued to the underside to prevent to gun coming adrift and to allow traverse as required. It’s best to attach the gun to the base last for easier painting and handling as there are a lot of fine parts on the gun asking to be broken if handling too much.
The gun can also be built in the stand-alone mode with the inclusion of the wheels and alternate axles that allow you to build the gun with the wheels in the lowered travel position or raised firing position and you basically need to choose your required configuration if building a stand-alone gun as the axles glue directly to the sides of the gun base.
This is an excellent kit of the ZU-23-2 and hopefully Meng will release this as a separate kit as the possibilities for its uses are almost endless, and I can see people buying more than kit just for the gun with the pickup as a bonus.
Included with the instructions are colour illustrations of two options red or blue as well as the white on the box top but you could basically finish the kit in state of disrepair as you wish. Also included are paint numbers for Hobby Color, Mr.Hobby and Vallejo colours used during the construction.
It looks to be an excellent kit of the 70 series Toyota Land Cruiser pickup with well-defined clean details on the body and rear cargo tray, the cab interior is also well done along with the suspension and chassis with fairly straightforward assembly.
The ZU-23-2 is also extremely well detailed with the assembly a little more complicated due to the many small parts but should build into an excellent model. The options of just three elevation positions is a little restrictive but this could easily be overcome and a big bonus is the inclusion of the wheels to enable you to build the gun either on the pickup tray or as a ground mounting.
There are also numerous photos showing the pickup fitted with the ZPU-1 14.5mm gun so some cross kitting with the earlier Meng kit is possible if you wanted to use this gun elsewhere, the possibilities are almost endless.
Rating 9/10
Click on thumbnails for larger view
Click on thumbnails for larger view


Sprue Detail Images


Close new window to return to page
 for the review kit