
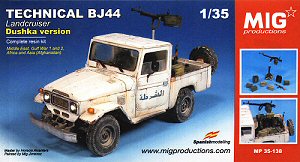
Technical BJ44 Landcruiser
Dushka Version
1:35 #MP 35-138
Construction Feature by Terry Ashley
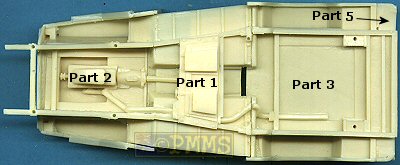
Stepping through the instructions starts with attaching the rear tray (part 3) and central chassis (part 1) and there is a gap on the upper side that is there to take the rear cab panel and you have to make sure the tray and chassis are glued perfectly straight.
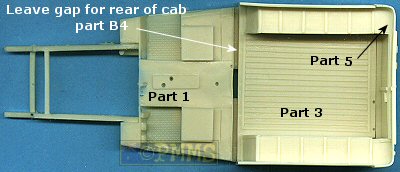

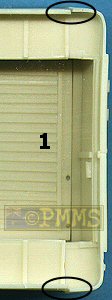
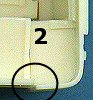
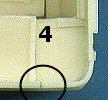
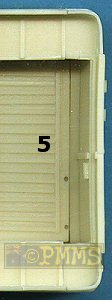
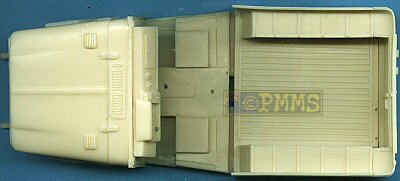
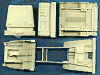
The rear panel (part 5) was slightly wider than the tray section (part 3) (Image 1 and 2) and required a bit of trimming for a good fit. This was done by cutting off the top sill on part 5 (Image 3) and after trimming repositioned to align with the sides of the tray (Image 4) and then trimming the side panel level with the tray sides (Image 5); this was all quite easy as the resin is very easy to work with.
 |
   |
 |
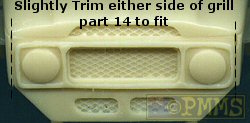
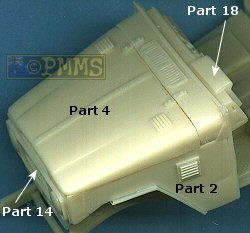
The front grill section required minor trimming of the sides to fit inside the recesses on the engine section and the hood fitted quite well with just minor trimming at the rear side corners of the hood to match the body sides.
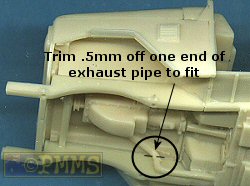
Fitting the front body section to the chassis was very easy with precise location
to the central floor and lower chassis frame but you will need to trim about
.5mm off the end of the cast on exhaust pipe either on the body or chassis
(only one) for a good fit and after attaching the body you should check the
alignment of the rear tray and front body section as this will determine if
the model will sit correctly with all four feet on the ground.
I found there was a very slight twist between the two and to remedy this I
poured hot water over the centre cab floor section and re-aligned the parts
with a slight twist, as I mentioned this was only very small but will ensure
everything sits square and of course you should take care when playing with
hot water.
The fenders fitted precisely without modification to the small locating ribs on the side of the body and the lower step plate either side and front bumper also fitted the chassis members exactly.
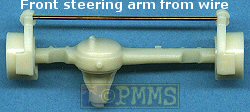
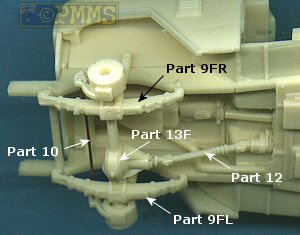
Attaching the suspension was fairly straightforward due the locating pins on the leaf springs and indentations on the springs and axles for precise location and I firstly glued the leaf springs in place and let the cyanoacrylate cure completely before attaching the axles as this meant you didn’t have to worry about lining up the springs and axles at the same time. The drive shafts were attached after the axles were fitted for the same reason and for the steering arm on the front wheels I replaced the resin arm with copper wire inserted into holes drilled in the arm linkages as this was fair easier to handle than the resin part.
With the rear suspension I attached the exhaust pipe before the suspension to make things easier and attached the leaf springs and axles in the same manner as the front suspension.
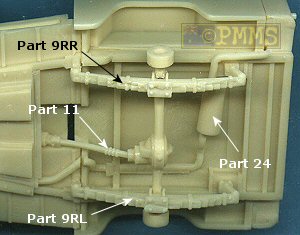
To attach the wheels I inserted small plastic rod axles and drilled holes in the drum brakes on the end of the axles to make fitting the wheels easier but make sure you don’t drill right through the drums if you do this?
Assembling the interior was straightforward apart from attaching the steering wheel which doesn’t seem to have a steering column and it was unclear how this was fitted to the instrument panel.
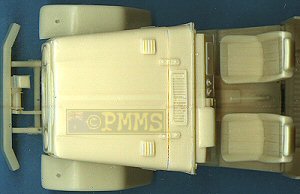
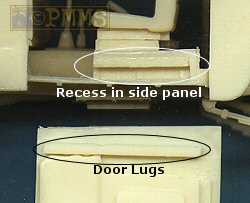
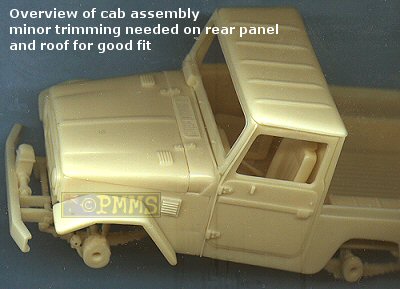
The cab rear and sides are best left off till the interior is painted and weathered and fitted quite well but some minor trimming may be needed for a good fit and test fitting will determine what is needed. The doors have large locating lugs on the bottom that fit into recesses on the lower chassis for a very precise fit and this does help ensure the whole assembly is square. The final parts such as the mirrors and fender lights are easy to fit and as mentioned you will have to find clear sheet for the windscreen and windows and there are the separate wipers to add to the windscreen frame.
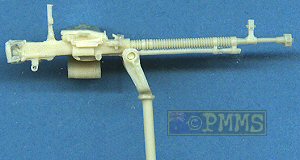
The Dushka MG and mounting fitted together okay and you can place the other items as you see fit.
Conclusion:
Overall the assembly was quite straightforward with only a few areas requiring
attention but nothing out of the ordinary for a full resin kit and will build
into an attractive model to use in any modern conflict situation.
Highly recommended.
Return to First Look Review.


Page created 7 January 2005