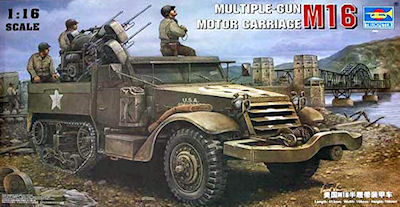
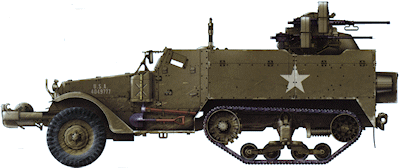
 The White 160AX petrol engine that powered all M2 and M3 half-track types is quite comprehensive and has all the main engine components included but there are a couple of items that have to be added.
The engine and firewall is made up of 84 plastic and 8 photo etch parts with many of the engine accessories consisting of multiple parts for good detail to be included, the generator is good example as this has 7 parts but here are some issues detail wise also.
The engine block is in two halves with a nicely detailed head and two etched metal side panels with the exhaust manifold having six separate gaskets; each of these is numbered differently so you must be careful to put the right one in the right position?
At the front is the separate engine mounting trunnion (part W2) and its advisable not to glue this in place as it has to line up with the chassis when fitting the engine but it is held in place with the front pulley (part W22) and doesn’t need gluing in any case.
A quick word on the mounting trunnion as this is the wrong shape with compromises included to fit to the metal chassis instead of having the curved ends that attach inside the chassis frame on the actual vehicle. This can be modified if you are showing the engine exposed but would make it a little more difficult to fit the trunnion, hence the compromises in the design, its up to you to correct or not?
The radiator fan is in etched brass but you will need the bend each blade to shape as they are flat as they come with the assembly of the various accessories all straightforward.
Some accessories will need a little attention such as the distributor which lacks the 7 lead attachments and the 6 separate spark plugs have the lead extensions at the wrong angle and you will need to reposition these when adding the wire leads to the distributor. The fuel pump and carburettor could do with additional detailing and the wiring added and you will also need to add the two fan belts between the generator and fan boss as these are not provided with the pulleys cleanly moulding and these can be added using tape, paper or any material you prefer?
But overall the details provided are very good and look quite impressive when assembled and adding the additional details will improve this further.
Fitting the assembled engine to the chassis and transmission is very straightforward due to the cut-out in the transmission and the large locating lug on the back of the engine which forms the upper part of the transmission. This provides a firm footing for the engine with the front trunnions resting on top of the chassis frames as mentioned above.
 This consist of two large parts with the front section being devoid of any detail with just a flat front and this is what you see through the open front louvers on the engine compartment unfortunately and adding some radiator detail to this will improve the final appearance.
Fitting the assembled radiator to the chassis raised a few issues as the circular fairing for the fan didn’t match up properly and the top radiator hose also does not match up and some modifications will be needed to fit the radiator for the fan blades to sit evenly inside the fairing. The top radiator hose is less critical and can be repositioned to mate with the radiator once the fan blades have been aligned with the faring.
 Assembly of the winch drum is quite straightforward but fitting this into the winch tray (part X16) is a little tricky to get the end washer (part X17) and the central shaft in place if you want this to rotate after assembly, but if not than just glue everything in place.
Detail on the winch housing is nicely done with well defined embossing of the “Tulsa Winch Co” and this housing traps the central drum shaft into position. There is also the underside drum guard (part X23) which is not mentioned in the instructions but just appears in the illustrations to be added.
On the underside of the winch is the motor and the long power take-off shaft leading back to the transmission and this too is quite straightforward in assembly. You should also remember when fitting the winch assembly that the power take-off shaft should go through the hole in the front of the engine compartment panel, hench the shaft on two sections.
To fit the winch assembly to the chassis there is the two chassis extensions screwed to each side of the metal chassis and the assembled which fits neatly into slots in the front of the chassis frames and into locating slots in the extension for a snug and precise location.
You are provided the long thread and length of chain to add as the towing cable but the large hook commonly seen fitted to the end of the tow cable and usually resting around one of the bumper towing hooks is not provided and this will have to be scratch built of sourced elsewhere.
 The large front bumper is in one piece with the correct contours with the separate four separate end plates, two towing hooks and separate L shaped fender extensions joined to the chassis sides. The join seams on the L extensions will need to be filled as these are smooth on the actual extensions but there are some details missing from the bumpers that you would think would be there in this scale?
These are the rivets and bolts on the outer top sections of the bumper and these should be added as they are quite noticeable on the actual bumpers.
It should be noted that there are four dome rivets and one hex bolt on top of the outer bumper and two slotted screws on the front of the fenders and I added these using available aftermarket rivets and bolts. Also provided is the armoured guard for the winch motor which is often fitted to the underside of the bumper and this is glued to the contours of the bumper, there are some large moulding seams to be removed from this guard before fitting.
The fit of the bumper to the chassis extensions is very straightforward so long as the alignment of the chassis is correct, which is another reason to temporarily fit the winch tray as you assembly the chassis as noted with the chassis assembly.
|


