
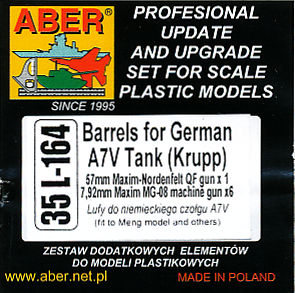
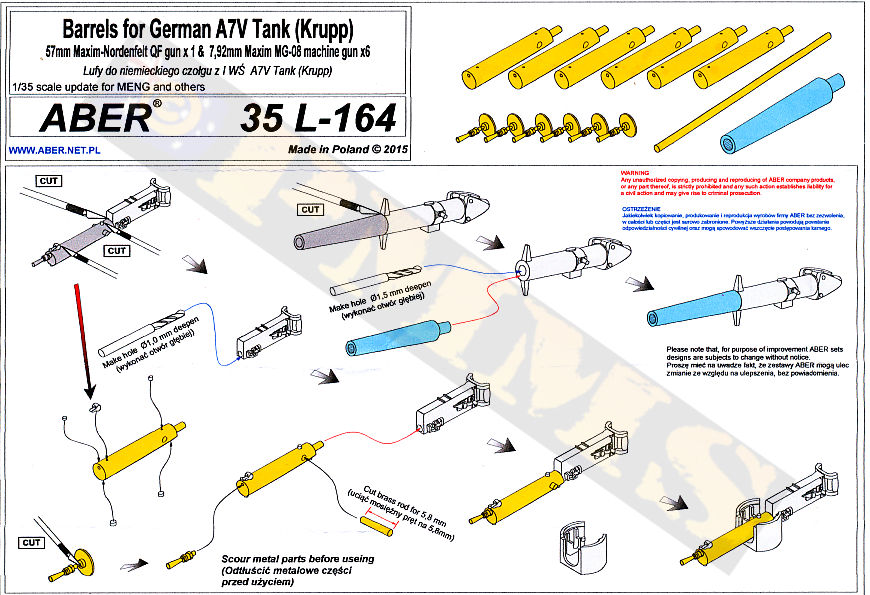
Barrels for German WWI A7V Tank (Krupp)
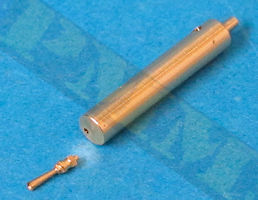
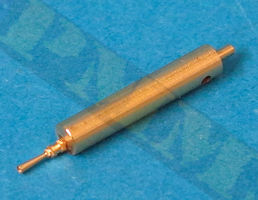
ABER Set No. 35 L-164
1:35 Scale
Review by Terry Ashley
The standard of machining is excellent with the only cleanup needed is to cut the machining support base from the fine muzzle along with cutting the brass rod into 5mm lengths. Also included is the standard ABER instruction sheet with clear easy to follow assembly sequences. although I did deviate from the instructions a little to make assembly easier as we will see.
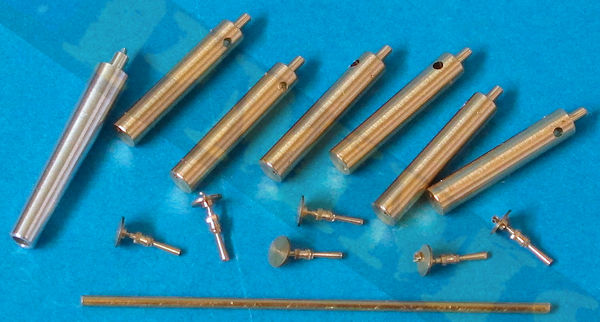
After assembling one of the MGs I would recommend fitting the 5mm section of brass rod for the gun trunnion pivots before anything else, this was due in some part to the very tight fit of the rod through the hole in the jacket that required me to use a jewellers hammer to knock it into place and doing this with all the small parts fitted is asking for trouble. Also with the pivot rod fitted this makes it a lot easier to fit the cooling jack at the exact right angle to the receiver when assembling the two, so doing this first has a couple of benefits. It is fairly easy to cut the brass rod into the 5mm sections using a fine razor saw or similar and filing the ends slightly to remove any burrs from the cutting.
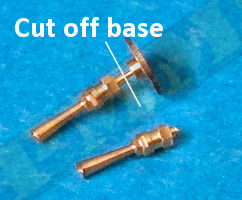
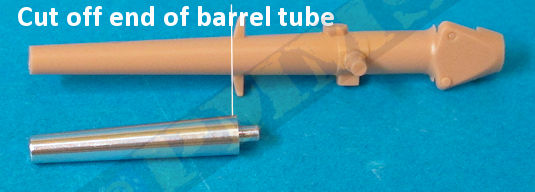
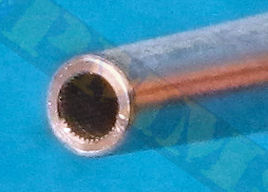
With the pivot rods in place you then cut the machining base from the fine muzzle, this can be done with a pair of model clippers and the burr filed smooth, you only need about 1mm of the pin remaining as the locating hole on the cooling jacket is not that deep. The muzzle itself is very finely machined with a drilled out flash suppressor for an excellent appearance after assembly. When gluing the muzzle to the cooling jacket ensue this is aligned correctly before the cyanoacrylate cures as the small locating pin can allow the muzzle to move about a little during fitting.
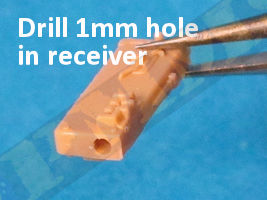
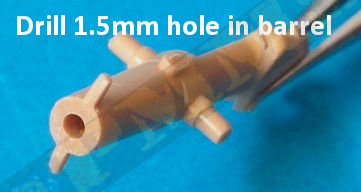
With the muzzle/water jacket assembled we can move the kit MG where you firstly cut away the plastic cooling jacket from the receiver ensuring the end of the receiver is perfectly smooth and square, you then drill a 1mm hole for the brass cooling jacket pin, it does help if you mark the centre line of the jacket on the receiver with a soft pencil before cutting the jacket away.
You then simply glue the cooling jacket pin into the receiver hole with cyanoacrylate noting the correct position of the muzzle and using the pivot pins to align the jacket at right angles to the receiver as mentioned earlier. Once fitted you then carefully with a shape scalpel blade (I use an NT cutter blade for very fine cuts) cut away the moulded on plastic detail from the kit cooling jacket and glue to the corresponding position on the brass jacket. I only cut one detail at a time as they are extremely small and you don't want them lying around to get lost while gluing another.
With the small details added you can them assemble the remainder of the MG as per the kit instructions.
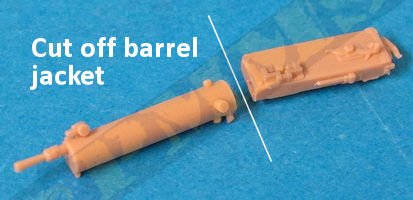
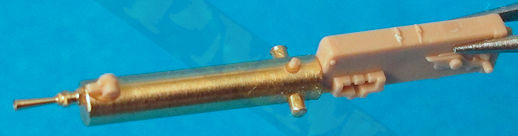
Additional details carefully trimmed from the plastic sleeve and attached to the metal sleeve.
It is recommended to fit the small brass rod pinnion before anything else,
this will prevent damage to the smaller details when fitting the pinnion
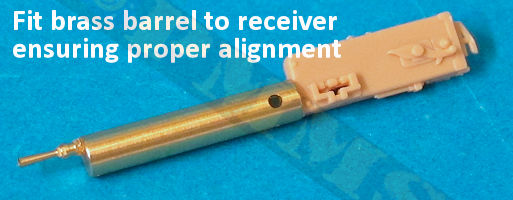
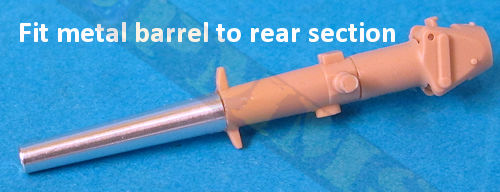
Attach the metal barrel to the rear barrel section, not the fine rifling included inside the barrel.
The remainder of the gun is assembled as per instructions.
Click on thumbnails for larger view
Click Browsers BACK button to return to page
The sets offers a nice enhancement of the kit gun details to add that but of finesse to the kit
Highly recommended 9/10
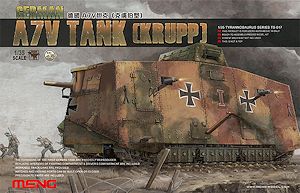
| Sturmpanzer A7V: First of the Panzers Tankograd - World War One No.1001 ISBN-13: 978-3936519112  |
German Tanks in WWI: The A7V & Early Tank Development Schiffer Military History ISBN13: 9780887402371  |
Thanks to
Please to help the reviews continue, thank you
