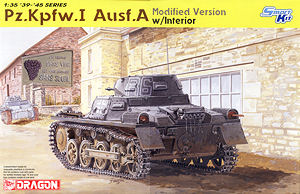
The Kit:
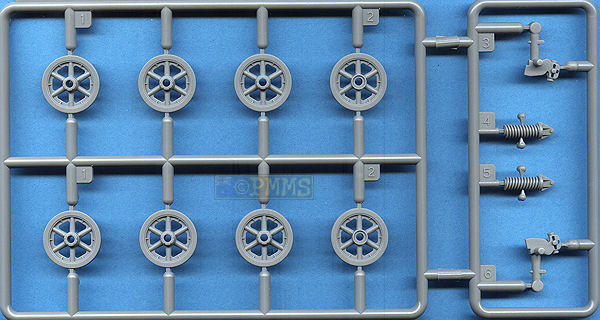
As you would expect uses a number of sprues from kit #6289 and #6220 with some updates plus the additional parts for this version as mentioned above plus new road wheels with etched inserts to give good detail definition.
Dimensional the kit measures up very well against 1:35 plans in the Achtung Panzer, Ground Power and Panzer Tracks books but there are some instruction bloopers just to see if your paying attention?
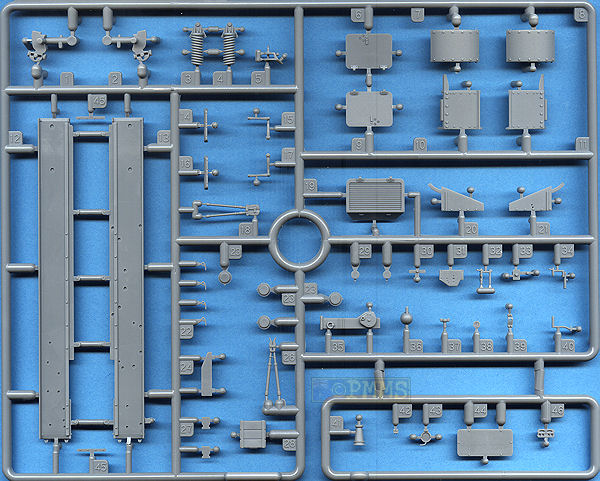
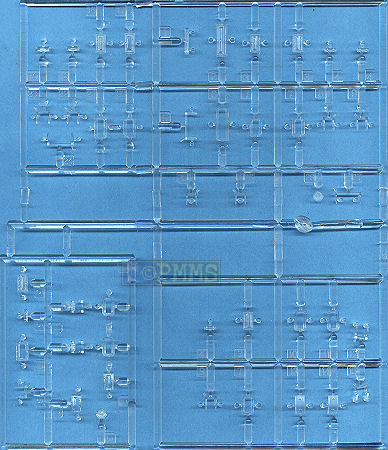
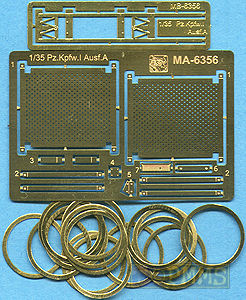
The kit has 240 parts in light grey plastic, a further 47 in clear plastic plus two small etched frets, the 16 formed brass rings for the road wheels, one small decal sheet as well as a bag of individual “magic tracks” and the instruction sheet.
Metal parts
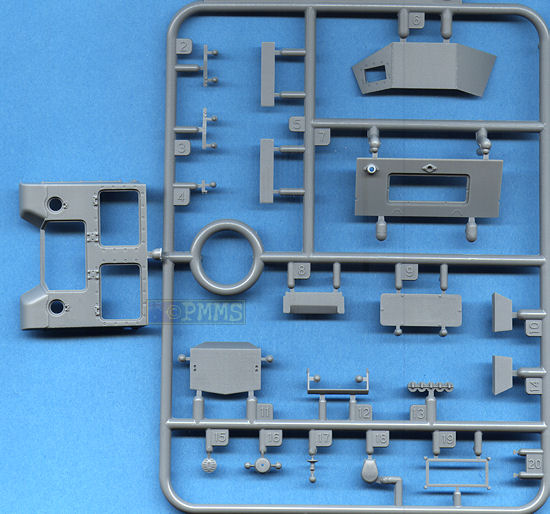
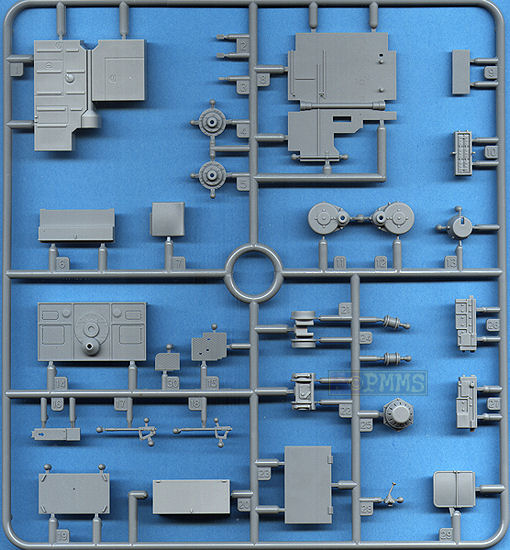
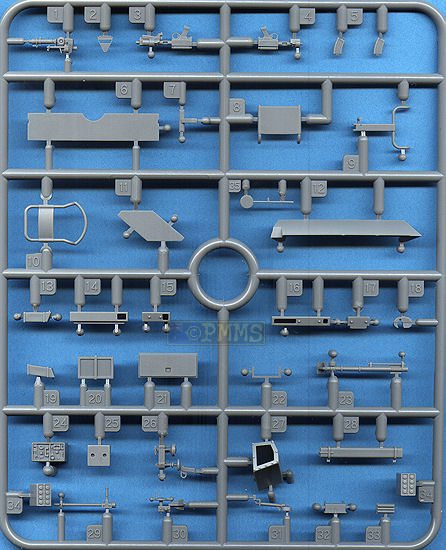
Sprues A, B, C, D and K, W (clear parts) plus the lower hull tub are straight from kits #6220, #6289 and Sprue G from the Flakpanzer kit with a few amendments along with new sprues F, J and L with the new hull and turret interior parts plus revised etched frets for this kit.
The standard of moulding is again excellent with virtually no pin marks to contend with due to the now standard plastic “nodes” on the parts which will require care when removing from the finer parts but are worth the effort for the blemish free parts.
Lower Hull:
This is a conventional tub with separate front and rear panels with panel and bolt head details on the bottom plate as well as axle and return roller mountings on the hull sides.
The most notable update here is the relocation of the return rollers to represent the staggered rollers as they should be as they are not level with the last slightly lower than the first. To achieve this, the last post is still in the same position as before with the others located about 0.5 and 1mm higher than on the first kit. The positioning matches that shown on the Panzer Tracts almost perfectly with just a minor .5mm difference on the front post which is nothing to get excited over with the main point being they are now correctly staggered.
The separate front panel has the final drive housing contours correct as well as the lower bolt heads and the underside weld seams on the final drive housings while the rear panel features a curved lower profile. While this curve is on the actual panel it is too rounded on the kit panel than the actual curve which is a little sharper than depicted but as this very subtle and not easily seen on the finished kit is probably not worth worrying about.

On the rear panel are the 3.Series style tail light and the towing pintle plus the wooden jack block rack while at the front there are the alternate glacis plates with the 600mm and 750mm wide inspection hatch also as separate parts and as mentioned you should check your references on which is applicable to the model you are building. There are additional towing hooks and the central two part headlight and right side long horn which is hollowed out with slide moulds as well as new shorter Bosch horn and again you check references to see which is applicable as earlier 3.Series/La.S vehicle had the longer horn and later vehicles the Bosch horn.
Suspension:
As mentioned this is mostly from the previous kits but the drive sprockets has slightly undersized drive teeth although not that noticeable and has rim bolts on both sides of the sprocket. The original road wheels are still included and are the correct type for the 3.Series/La.S vehicle having the reinforcing ribs on all wheels but the wheel cut-out profile should be more rounded at the outer edges and also the first road wheel hub cap is slightly the wrong profile with the small notches around the hub missing but these are shown on the other road wheels.
Dragon has included newly tooled reinforced road wheels which have separate etched rim rings that provide the correct lip inside the rims and improve the look of the wheels nicely. Fitting the 16 etched rings will require a little care but the wheels have small recesses around the rims to help locate these correctly. As mentioned the original wheels are also the reinforced type if you want to take the simpler assembly route and use these instead of the new ones requiring more assembly but the new ones do look better once fitted and would be the preferred option.
Watch the instructions here as they tell you make 2 sets with wheel parts L1 and 6 sets with wheel parts L2 when in fact it should be the other way around, not a big deal but might have you scratching your head initially.
The rear idlers are made up of three parts each, the main wheel and two inserts that form the inner rim lip which looks very good on the assembled wheels. I mentioned in the reviews of the Flakpanzer IA and Panzer IA Early that the idler wheels were 1mm oversized in diameter when compared to the 1:35 plans on the Achtung Panzer, Ground Power and Panzer Tracts books and thankfully Dragon have corrected the idlers in this kit and are now the correct scale diameter of 18mm.
The axle bogies and springs are nicely done with well defined details but with fairly prominent mould seams to be removed which is easy enough with the return roller hubs also nicely depicted details. The first station shock absorber spring has been revised to better represent the spring on the early Panzer Ia with the original spring better depicting that of the later 4.Series/La.S series.
Assembly of the suspension is very easy and precise with the fit of the parts actually holding the bogie units together without glue but of course you would glue them in place on the kit.
Tracks:
These are all individual link “Magic Track” that don’t require any cleanup and have finer details especially on the end pins but again being very small will require some patience to assemble but the end result gives a better impression than the previous kit tracks.
While they are individual links they are not workable and have to be glued together and its best to use thin tube glue and assemble a short section and allow the glue to “go off” and then fit around the drive sprocket and idler and get the right track sag before leaving them to dry completely. This is more fiddley than actual working tracks and you have to get the track sag right before the glue sets but not having any cleanup shortens the assembly time.
Fenders:
The two main fenders are separate parts with fine tread plate pattern on the top with a single bolted strip on the undersides and you have to open up the applicable locating holes for the tools, exhaust and other details. At the front are two small inside fender fillets that will need care fitting as the location is not that precise and these govern where the main fenders are located.
There are separate front and rear fender sections with fine attachments with additional small wing nuts added and the two small fender lights while the tools have moulded on tool clips and the early type D jack has the wire cutters mounted on the side which is correct for the 3.Series tank.
The rear exhausts are in two parts with additional etched heat guards that are best annealed by running through a candle flame to make curving them to shape easier. These guards have additional fine etched mountings fitted on the inside with the small “feet” bent inwards for mounting on the fenders. The ends of the fishtail exhaust pipes are hollowed out slightly for a nice impression and the pipes out from the engine compartment have good texturing.
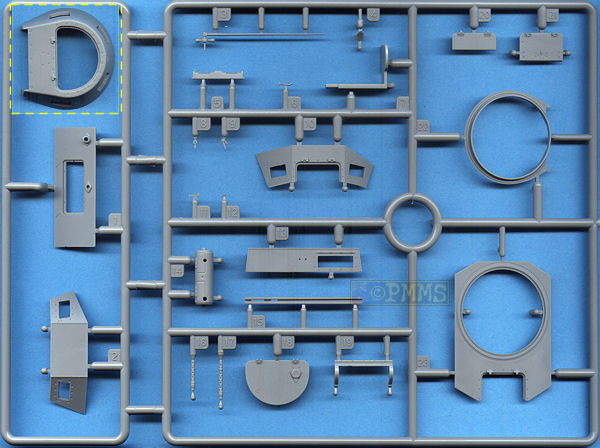
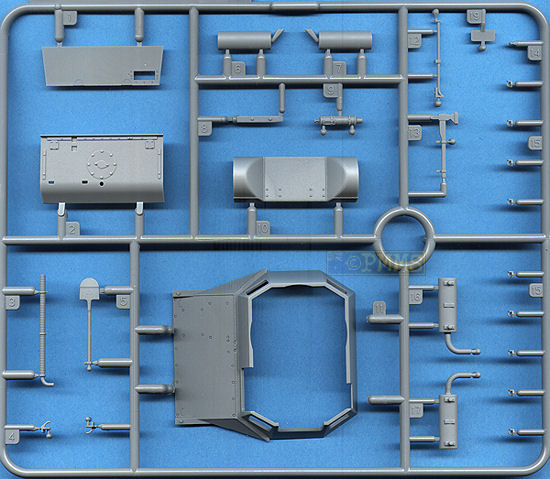
Superstructure:
The upper superstructure has the forward panel with nicely represented flush screws and weld seam with the main superstructure being an inner shell with separate front, side, top and rear panels with cut-outs for the vision ports and hatches included.
Having all these panels separate allows for the weld seams and flush screws around the visor openings to be depicted with excellent definition and the turret ring with flush screws and inner traverse teeth is also included although the turret completely hides this after assembly it’s nice to see it there. The turret ring details have been refined in this kit but as mentioned you can’t see this once the turret is in place.
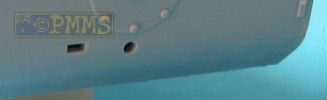
The notable update for this kit is the new right side superstructure panel without the rear right vision port which is correct for the 3.Series/La.S vehicle but the inner shell still has the opening for the vision port which will need filling with the instructions showing to do this. An easier option than filling the hole would be to just add a small piece of thin plastic card the size of the inner wall for a quick and easy ‘fix’ eliminating any filling and sanding.
The fit of all the panels to the inner shell and to each other is excellent not requiring any trimming or filler, any minor gaps were small enough to the dealt with by squeezing them together while gluing.
The two part side crew hatch has inner detail without any pin marks and you are also provided with the two bolted re-enforcing strips added to the lower superstructure sides. Take care as the instructions don’t actually tell you to add these, they just appear in one of the construction sequence drawings without any mention (step 18) but they are parts F5 and easy to fit with the full row of bolts at the bottom.
The fit of the superstructure to the lower hull was very good but there may be some trimming required at the front of the glacis lower front plate join as this wasn’t the best on my kit.
Interior:
The lower floor is in two sections with the forward lower section having one axle channel with separate two part seat and driver’s levers as well as the right side battery box that has a separate lid showing the battery detail if you want to show open.
The separate driver’s foot pedals are added to a small raised plate with tread plate included and the fit of the floor sections to the lower hull being very good with cut-outs to position this around the lower tub axle mountings.
The rear raised fighting compartment floor has amended details but still no tread plate pattern or the different level step between the two sides as it should and there are no details on the sidewalls due to these being the insides of the lower hull tub.
At the back is the fighting compartment bulkhead but the prominent starter motor is still missing although you do get the L shaped tread plate cover for this leaving a bare space where the starter motor should go and scratching one from plastic rod would look better than just an empty space under the guard.
The transmission and differentials are in multiple parts with nice detail overall although the differentials are a little basic but fit neatly in place and looks okay when viewed through the glacis inspection panel or the fighting compartment.
Additional parts for this kit are the spare barrel container and signal flag tubes on the right wall and the 7.92mm ammo racks on the side sponsons and rear wall along with the radio in a nicely etched mounting box along with the baggage locker and headphone holder added to the underside of the superstructure front plate.
One thing conspicuous by its absence is the Driver’s instrument panel that should be mounted to the underside of the glacis plate and you will have to scratch this or find one elsewhere.
All the visors in the superstructure are separate parts with additional parts in clear plastic for the inner visor mountings and “glass” sections which allow you to show the visors open if you wish for nice animation.
Engine Deck:
The deck has separate engine inspection hatches, fuel filler caps and rear intake hatch for good definition although there is no engine interior but will be helpful if you want to add an aftermarket engine.
The details on the deck and separate hatches is very good, and also have the armoured intake cowls moulded integrally with the engine deck but you might want to add fine weld seams along the cowl joins as these are not included. The inside intakes are just in moulded plastic and not etched as you can’t see them anyway, so this is not a problem and for those wanting to add additional detail there are actually three louvers inside the armoured cowls when seen from below.
Also included for this kit is the armoured intake hatch cover and three part smoke grenade candle rack carried on the back most notably on Panzer IA of the Afrika Korps. You will need to add the five small chains to the smoke candles and also the wire leading the back of the superstructure to finish off this assembly as these are not provided. You should again check references to see if these should be fitted to the model you are building as not all vehicles had them fitted.
A little minor trimming was required at the back of the deck to fit between the fenders but other than that this also fitted well to the lower hull and superstructure.
Turret:
This has the upper shell and lower turret ring with separate vision ports and top hatch with subtle but nicely rendered weld seams and flush screws on the turret shell which should come up well with careful painting and the hatch has details on both sides without any pin marks plus three very fine plastic latches for the inside which will need care fitting and the three small lifting hooks are also separate parts.
The two M.G.13k machine guns have nicely rendered cooling jackets holes but you may want to drill out the muzzles for a better look with the three part gun mounting also having nice details and will allow the guns to elevate after assembly.
Turret Interior:
All the visors are separate with clear inner brackets and “glass” sections that will allow you to show these open as well as separate lower turret ring as mentioned.
The interior is quite extensive with the two 7.92mm MG13s having the full breech and shell ejection chutes along with separate 25 round magazines for each gun. The telescopic sight is in three parts and the Commander’s seat is in five parts and is an excellent representation of the real thing but you will have to take care cleaning the mould seams from the thin seat frames.
Added to the turret ring is the traverse hand wheel assembly and like the Tristar Panzer IA kit the 8 magazine ready rack mounted on the turret rim under the guns is also missing.
Decals:
The small well printed sheet has markings for three Panzer IAs all in overall Panzer Grey and if you have the decal sheet from the first Panzer IA kit two of those markings can also be used with this kit.
Markings included in this kit:
- 6.Pz.Div.(HQ), Western Front, 1939-1940
- 3./Pz.Abt.z.b.V.40, Norway 1940
- 1.Abt., 15Pz.Div., 5 Pz.Div., Sandomierz, Poland 1939
- And the two applicable markings from kit #6289 are:
- 1. Pz.Rgt.5, 5.leichte Div., Libya 1941 in overall sand.
- 2. 3./Pz.Abt.z.b.V.40, Norway 1940 in overall Panzer Grey
|

Conclusion:
Dragon have thankfully made the alterations required from their first Panzer I A kit to produce a nice wartime era 3.Series/La.S vehicle such as deleting the right side superstructure visor, adding the side bolted re-enforcing strips along with the rear inlet cowls and smoke candles as well as correcting the return roller alignment and idler wheel diameter.
Added to this is the full interior excepting the engine which has most of the basic components included while leaving scope for additional detailing but a driver’s instrument panel would have been nice.
There are a couple of new parts also applicable to the last 4.Series/La.S Panzer IA and it’s highly probable we will see this version released also and overall the kit will build quite easily into a very nice wartime Panzer IA 3.Series.
Highly recommended 8/10.
See the Panzer I Subjects page for
reviews of additional kit and update sets.
The Sprues:
Click on thumbnails for larger view

Detail Images
Close new window to return to review
References:
Thanks to my credit card and the excellent service from for
the review kit.
for
the review kit.