
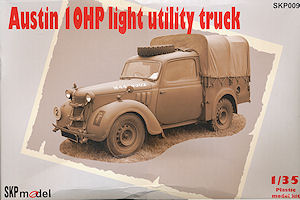
Austin 10HP Light Utility Truck
SKP Model 1:35 Kit #SKP 009
Review by Terry Ashley
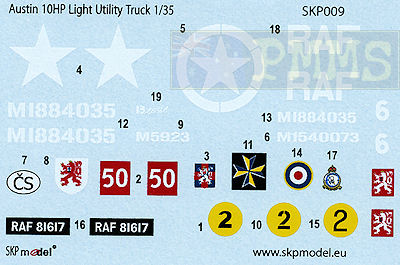
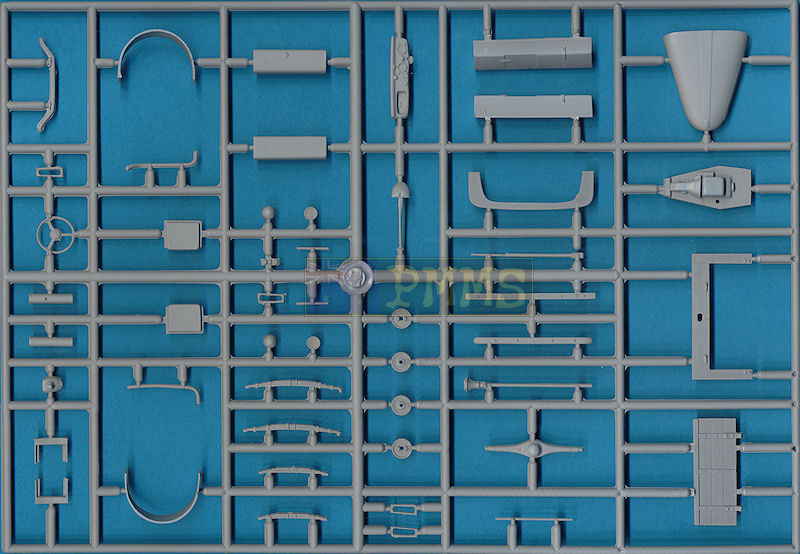
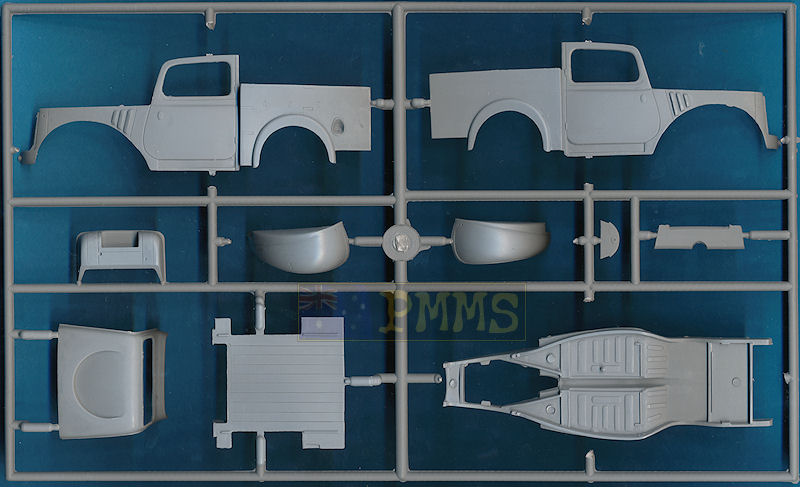
This new kit from SKP Model is really a multi-media kit with 58 parts in light grey plastic, 52 parts in light blue resin, 10 resin parts for the lights, a vac formed rear tilt cover, a sheet of clear for the windows plus the decal sheet and small 18 page A5 sized instruction booklet.
I have no reliable plans for the vehicle but the overall dimensions basically match those of the scaled up Tamiya 1:48 ‘Tilly’ and the Accurate Armour kit, not that is in any way to determine if a kit is accurate or not.
The standard of plastic moulding is not that high and more reminiscent of low pressure moulds use for short run kit with fairly soft detail and quite substantial pin ejector marks both raised and recessed. There is also some flash and prominent mould seam lines to contend with on most parts which compromises the detail that is there during removal, so care is needed.
One thing to watch out for is there is no part numbers included on the sprues, only on the parts layout illustration with the instructions which means you continually have to refer back the instructions to identify some of the smaller parts during assembly which can become a little tedious.
The same applies to the resin parts but this is more common with resin sets so I guess doing it with the plastic parts isn’t all that different in the wash-up.
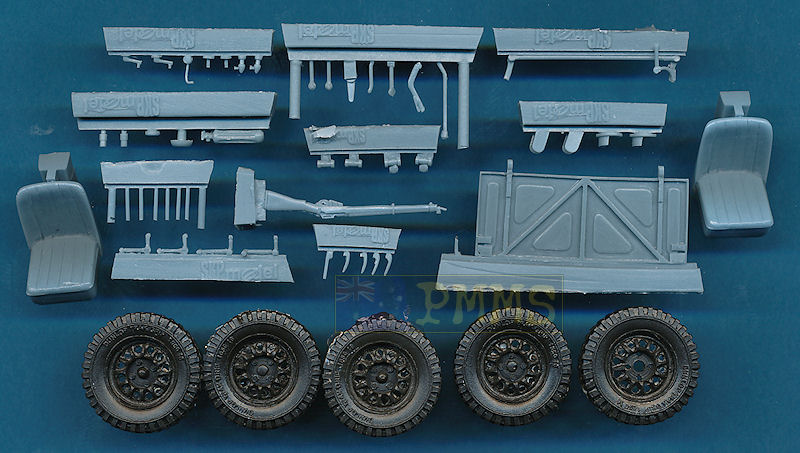
The standard of the resin parts is much better thankfully with clean crisp detail and just the usual casting plugs to remove and as most of the resin parts are quite small this is not a problem. There are a few problems with the larger resin parts such as the rear tailgate that is badly warped and the holes in the wheel rims not clearly defined but we’ll look at those further below.
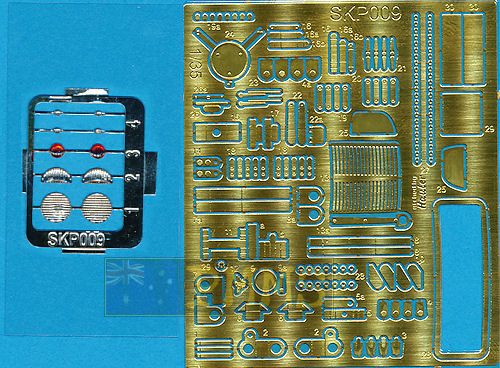
The etched fret is produced by Hauler for SKP so there is no problem here with clean parts and the usual engraved bending lines where required to make things easier.
The lower chassis parts have the chassis cross member and forward chassis frame that fit very precisely to the modified kit chassis taking any real guesswork out of the assembly. The large front radiator has excellent inner coaming and mesh detail on the rear side and this fits precisely to the chassis frame with the aid of a large locating pin.
Other parts added to this assembly are the inner rear wheel well covers, forward engine firewall bulkhead, the front mudguards (fenders), bonnet (hood) as well as interior parts such as the seats, driver’s controls, door handles and dashboard (instrument panel) to make up the basic body before the suspension and other resin/etched exterior parts are added.
Assembly of the body posed a few problems with the vague fit of some parts to begin with compromised with both side body panels being warped(twisted) to different degrees especially at the thinner front section over the wheels wells.
This meant the side panels had to be twisted back into some form of alignment while being glued and I used cyanoacrylate on a few occasions for a more immediate bond along with plastic cement.
Adding the inner firewall/bulkhead before fitting the side panels also aided in alignment but take care when fitting the lower foot plate to the firewall/bulkhead as the exact position it should go is not very clear but the bottom of the plate should be level with the bottom of the bulkhead. Might sound logical but it can go in other positions that look right until you come to fit to the floor pan.
The biggest problem was with the join at the front of the engine compartment with the cut-out for the etched radiator screen as this doesn’t actually mate to the floor pan just sitting out on its own. You get a small bulkhead (part B6) to reinforce the top join but nothing for the more important lower join which is poor to say the least. I fashioned a large reinforcing bulkhead from plastic card (see images) to make the join more substantial as this really does govern the alignment of the front radiator recess so make sure this is nice and square before proceeding or you can forget fitting the etched radiator screen properly later.
Adding the front mudguards at this stage also assisted in straightening the side panels and again cyanoacrylate was used for an instant bond to keep the parts in the right place. The rear wheel well inserts are not a good fit at all and are also incorrectly numbered in the instructions. The right part should be A33 (not A2) and the left insert should be A2 (not A3), these can be fitted as best you can as they are not easily seen after assembly so not a big deal.
The roof panel includes the windscreen frame and body panel over the engine bulkhead with an indentation in the roof for the spare wheel. The rear roof wall is a separate part and this is supposed to extend out from either side of the roof so ensure the roof is located centrally on the rear plate as the location is a little vague.
The windscreen frame is included with the main roof moulding but you also get a replacement etched frame that requires you cut away the moulded on frame to fit the etched frame. Given the amount of work involved in fitting the body parts together properly it’s probably easier to go with the moulded on frame to save yourself a bit of work, but that decision is up to the individual.
On the inside is added the dash board which you would obviously paint before attaching the roof to the body. It is advisable to test fit the roof while aligning the side body panels to ensure the correct width where the front section of the roof panel mates with the side body panels; this will save you more work when fitting the roof at this point.
The engine bonnet (hood) is then attached but the fit was again not that good due to the warp in the side body panels and a bit of a gap at the rear corners and forcing the side panels into line as you glue the bonnet in place should deal with any alignment issues.
The hole in the firewall for the steering column had to be drilled out and a locating hole for the gear shift lever drilled into the mounting (part A28) and you would obviously paint the interior before enclosing with the roof.
Inserting the clear sheet for the windows was another interesting exercise as the instructions include templates for the two side windows and the windscreen, the only problem is the templates are about two thirds the sizes they should be and are basically useless.
It’s best to lay the clear sheet over the windows and mark out the right sizes and test fit as you go to ensure you don’t cut away too much material as you can’t add it back again after, so take care.
Before adding the suspension there are substantial mould seam lines to be removed from the leaf springs and axles and care is needed not to compromise what little detail there on the parts and the rear axle has additional etched attachment brackets (parts D2) that the leaf springs attach too. I had the thin down the axles somewhat for these etched brackets to fit properly and you should ensure the whole assembly is nice and square before the glues dries.
Once the basic front and rear suspensions have been assembled there are additional etched and resin parts to be attached and as these don’t have any real bearing on the structural integrity of the assemblies they can be added at any time. The front suspension is fixed so if you wanted to show the wheels turned a bit of work would be involved to reposition the steering and link arms.
When test fitting the wheels it became apparent that the ride height was far too low with the wheels sitting too high inside the wheel wells, this required the removal of the suspension units using a sharp thin blade to give the finest cut and adding 1.5mm plastic card spacers between the suspension mounts and the chassis frames (see images).
The five wheels are cast in a black resin with the tread pattern quite well defined and fine “Dunlop Trak Grip” and tyre data embossed on the sidewalls but the wheel rims are not the best with substantial resin film as well as the odd chunk of resin in the rim lightening holes. The demarcation between the holes and rim recesses is not well defined and it is easy to end up with oversized holes, where there are heavier chunks of excess resin in the holes it’s even more difficult to get a clean hole the right size.
Added to this the wheels don’t have hub caps usually seen on the actual wheels or the later cable hoist discs as shown on the box top image which means there is a bit of work needed to get a result with the wheels.
The wheels attach to the axles via the separate brake drums but are not designed to rotate after assembly and you should ensure the drums are aligned correctly for the proper wheel fit.
The fit of the radiator grill will largely depend on the previous assembly when fitting the body halves together as outlined above and providing the sides are vertically aligned there shouldn’t be any problems? One issue with the etched grill is it is not quite tall enough and there is a resulting gap but fitting the frill so the gap is the same top and bottom will make this appear part of the setup and shouldn’t be that noticeably hopefully.
The front and rear bumper bars have etched mountings that need to be carefully bent to the shapes required with the instructions giving and overhead plan view of the curved front mountings to help get the parts in the right position.
A nice feature for the lights is the “glass” lens parts that consist of a silvered backing sheet with clear resin lens; this gives an excellent effect with the taillights having a red tint added.
The numerous etched brackets and resin parts along the body sides easily fit into place as per instructions with the only problem being with the later pressed steel rear gate supplied in resin.
This is badly warped and given the detail on the gate is basically unusable as you can’t just trim the edges to fit as this will destroy the gate detail, you are left to use the earlier wood panel gate in plastic which fits perfectly to the rear body panel.
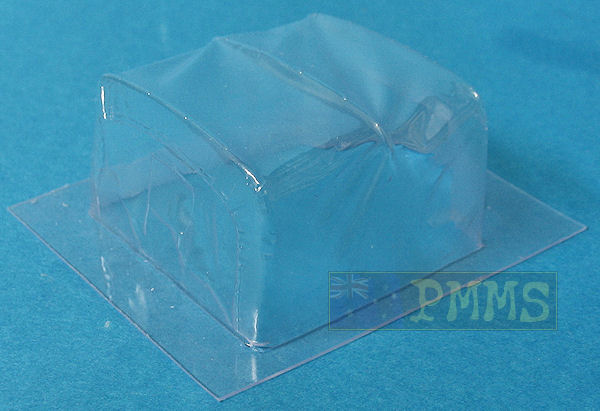
The full “canvas” tilt cover for the rear cargo bay is in thin clear vac formed sheet and has nice contours and seam line details included. Care is needed trimming the excess from the moulding given the thin sheet and resting this on a flat surface as you cut is far safer than trying to trim freehand.
There are 12 very small brass eyelets added to the edges of the cover allowing to add fine thread for the cover securing line used on the actual cover, the instructions show the correct thread pattern through the eyelets and body side hooks should you wish to add this detail?
Two of the marking options are for wartime ‘Tillys’ while two are depicting restored vehicles in private collections with camouflage and markings that are quite speculative. The option for the obligatory RAF ‘Tilly’ is incorrect as the RAF never used the Austin ‘Tilly’, only the Hillman ‘Tilly’ which was a different vehicle (Available as a resin kit #K157 from Accurate Armour should you want to build and actual RAF Hillman ‘Tilly’)
|
The etched and resin parts do add some finer detail to overall appearance and provided you are prepared to put in the hard yards during construction a reasonably representation of the Austin 10HP Light Utility Truck can result from the kit.
Recommended with reservations
Thanks to SKP Model for the review kit.
Kit parts
Click on thumbnails for larger view
Detail Images


Close new window to return to review
Thanks to SKP Model for the review kit.
