
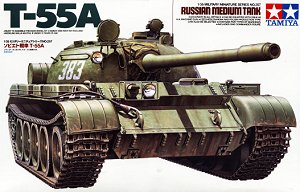
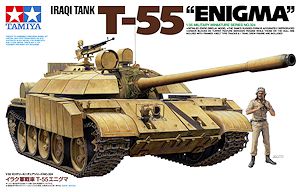
T-55 Metal Barrel comparison
1:35 Scale
Review by Terry Ashley
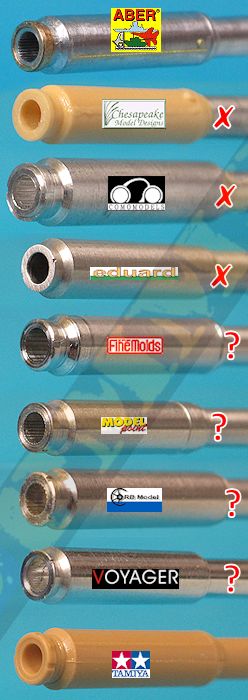
I am aware of eight metal barrels being released to date but only one, the Eduard barrel is specifically designed as “drop fit” for the Tamiya T-55 kits, the others will fit with some minor modifications and some won’t fit without major modifications, some have been around for a while and others newer so let’s see what’s on offer.
- ABER set #35 L07
- CMD set #CMD 16
- Como Models set #136001 (no longer available)
- Eduard set #34015
- Finemolds set #MG-48
- Modelpoint set #3516-4
- RB Models set #35B41
- Voyager Models set #VBS 0156
Note the mantlet ends of the RB and Voyager barrels have been modified in the image below
as per the notes below with all other barrels shown as they come.
The right hand line indicates where the barrel mates with the front of the kit gun mantlet.
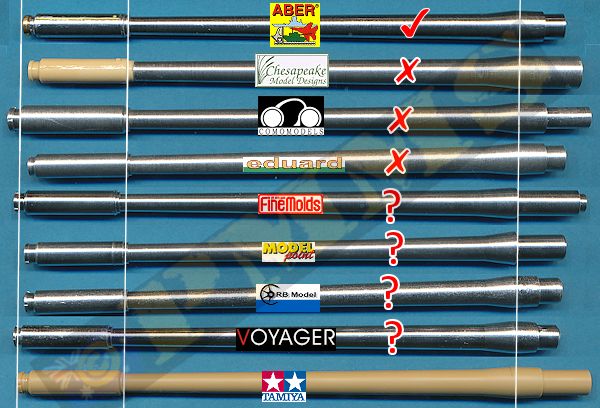
Dimensionally all seven vary to some degree, some being slightly longer or shorter with varying sizes for the fume extractor as well as having other mixed details so it’s difficult to isolate one that has everything right as it’s really a mixed bag. Only one, the CMD barrel with the resin fume extractor has the weld seam along the underside and this weld will need to be added to all the other metal barrels. Also note that for all barrels other than the Eduard you will need to remove the inner mantlet notch designed for the Tamiya plastic barrel to allow the metal barrels to fit.
As this comparison is dealing with the finer details we can eliminate three to start with:
The CMD barrel while having a resin fume extractor with the weld seam it is somewhat shorter and has no rifling or notches on the muzzle tip and the barrel end is just too big to fit the Tamiya gun mantlet without considerable work to enlarge the hole.
The Como Models barrel has an oversized fume extractor and crude rifling; also it’s no longer available se we won’t waste any more time on it. It will though fit the Tamiya kit okay.
The Eduard barrel while being specifically designed for the Tamiya kit and needs you to remove the inner mantlet notch but has no rifling or notches around the muzzle cap and lacks a little detail as a consequence compared to the other barrels.
This leaves five to look at more closely and as mentioned,all but the ABER barrel will need the fume extractor weld seam added and all need the notch inside the kit mantlet removed for fitting, a couple will also need other modifications to fit properly.
The ABER barrel has the fume extractor the same size as the Tamiya barrel and the bore drilled out to 8mm depth for a good appearance and includes fine rifling and the small notches around the separate brass muzzle cap and includes additional etched weld beads for around and along the fume extractor for nice detail. I didn't use all the weld beads provided as some appeared oversized and too prominent for a scale appearance, I only used the longways weld running along the lower side of the fume extractor.
The Finemolds barrel has a slightly larger fume extractor but . The fit to the Tamiya kit mantlet is a little loose and you will need to ensure it is positioned perfectly centrally in the mantlet as there is a small space between the barrel and mantlet edges.
The Modelpoint barrel has a slightly shorter fume extractor with the bore drilled out to 11mm depth for a good appearance and includes fine rifling and the small notches around the muzzle cap; it is also a good fit directly to the Tamiya kit mantlet for a viable alternative.
The RB Models barrel also has a slightly shorter fume extractor with the bore drilled out to 6.5mm depth and includes fine rifling and the small notches around the muzzle cap but the barrel as it comes requires modifications to fit the Tamiya mantlet. The Tamiya barrel is bevelled slightly where it enters the mantlet but the RB barrel has parallel edges and you will need to file the larger end section to the bevelled profile of the Tamiya barrel to fit into the mantlet. Once filed to shape the barrel fits well.
The Voyager Models barrel has a slightly shorter fume extractor but slightly longer barrel with the bore only drilled out to 3.5mm depth which does look noticeable shallow with the bore size and the very fine rifling is also quite shallow. It includes the muzzle cap indentation and the small notches around the muzzle cap but like the RB barrel requires modifications to fit the Tamiya mantlet. The Tamiya barrel is bevelled slightly where it enters the mantlet but the Voyager Models barrel has parallel edges and you will need to file the larger end section to the bevelled profile of the Tamiya barrel to fit into the mantlet. Once filed to shape the barrel fits well.
The ABER and Finemolds barrel fume extractor matches that of the Tamiya barrel while the other are slightly smaller and not having the exact dimensions of the fume extractor available one leans towards to Tamiya dimensions as a guide.
Both the RB and Voyager barrels need to be modified to fit the Tamiya mantlet which is puzzling as both are more recent releases presumably for the Tamiya kit, but once the filing is done they fit well. The ABER needs you to remove the inner locating lug from the kit mantlet which is easily done.
The shallow drilled bore hole and rifling is an issue with the Voyager barrel again given this is very noticeable on the larger 100mm barrel and in the end the first choice would be the ABER barrel due to being dimensionally accurate based on the kit barrel as well as the details well done with the separate end cap and the additional etched weld beads.
Following the ABER would be the Modelpoint with the others quite similar with different amounts of work needed to fit.
