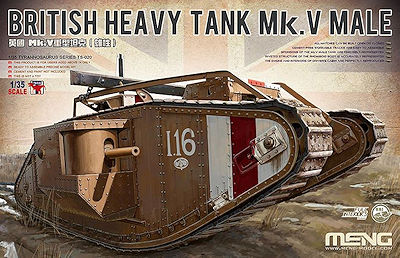
British Heavy Tank Mk.V Male
Meng Model 1:35 Scale Kit #TS-020
Review by Terry Ashley
Part 2 the Kit Build
Page 3 of 4
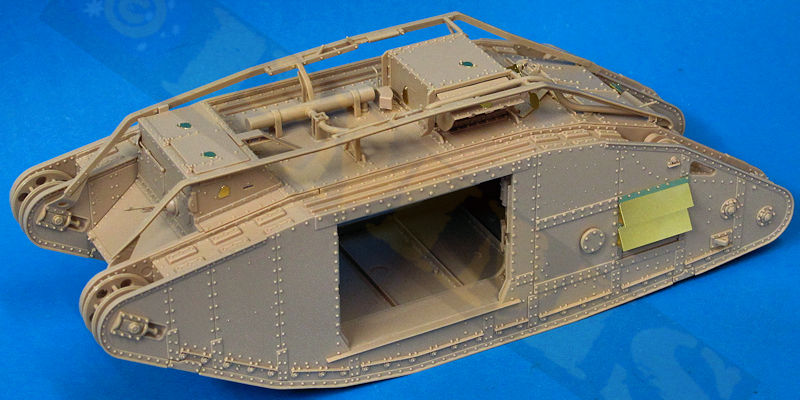
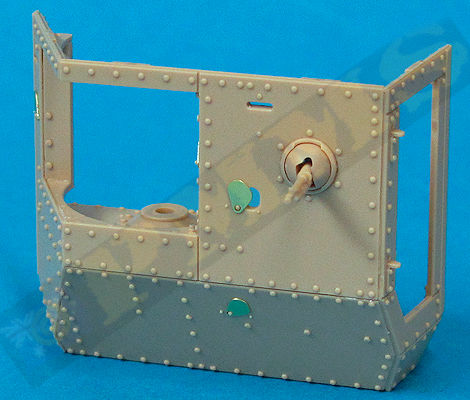
After deciding on the appropriate parts for open or closed hatches the assembly is quick and easy with excellent fit of all the panels, end frames and additional fittings and again make sure all the joins are as snug as can be for the best result.
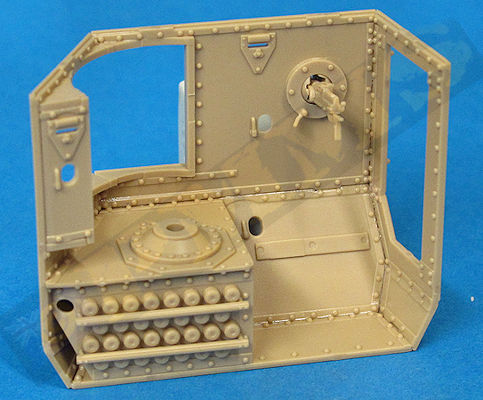
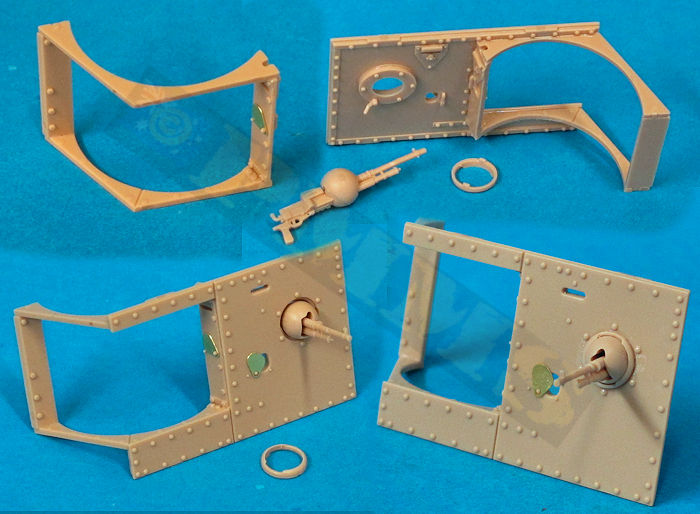
The front plate has the Hotchkiss MG ball mounting the same as described in step 23 and its best to fit this before assembling any of the cab panels, I also attached the pistol port covers before joining the panels but these can be added after just as easily.
The fit of all the panels was again excellent and providing you ensure a snug fit while gluing the assembly was trouble free and quite quick. Note there are additional handles added inside the cab used if fitting the CRIB device but if not using this device just leave these aside. The front visor hinges again have the small pins for fitting open or closed and you simply cut off the pins not required.
The exhaust pipe also fits well and as mention leaving this separate from the mounting bracket until now makes it easier to get the alignment right while fitting.
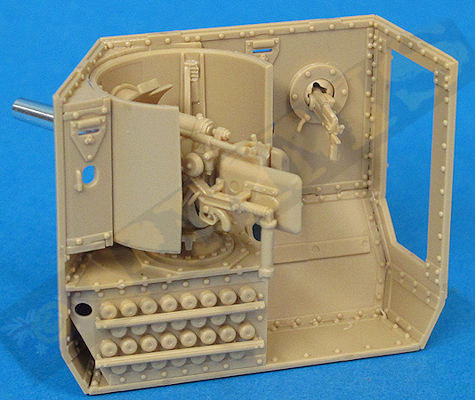
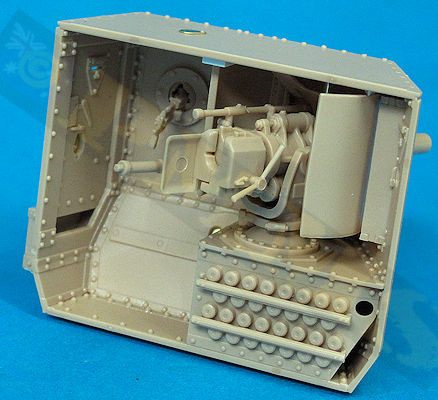
When attaching the gun control arm (N8) only glue this to the gun and not to the trunnion if you want the gun to elevate, the same goes for the long sight (N3) as both show to be glued to both the gun and trunnion in the instructions. Note the gun control arm is provided in the bent stowed position and if you want to depict this as in action, just cut off the end of the arm and reglue in the straight or extended position.
Added to the front of the gun is the smaller curved shield with the breech block lever and the base plate also added with without any problems?
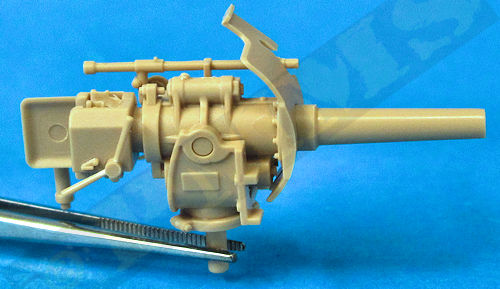
Gun assembled with control arm extended
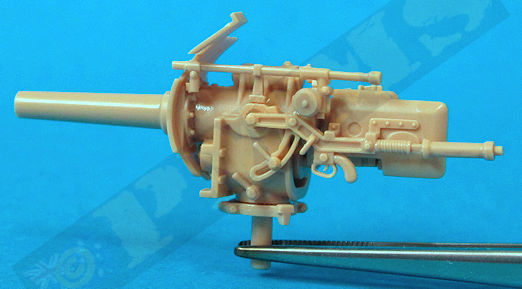
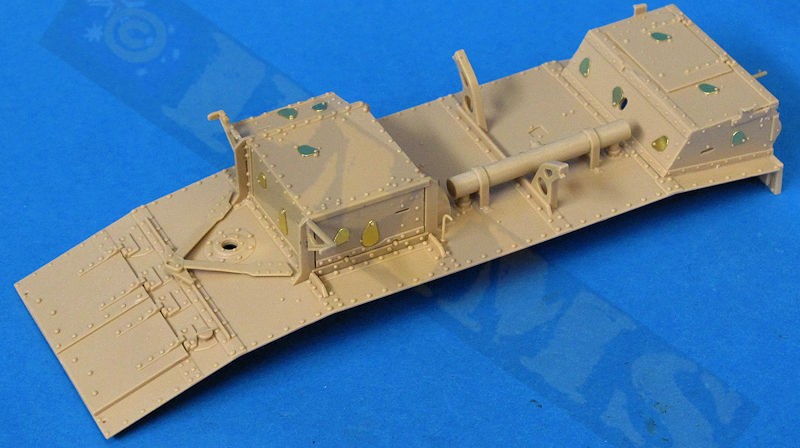
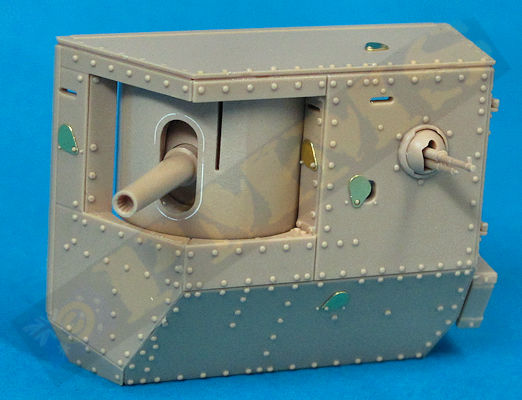
The large curved gun shield is a single moulding but when you fit the gun collar (N10) to the shield the join seam on the outside face of the shield must be filled and eliminated completely as the shield was smooth on the outer face. There are two gun mounting brackets (N5, N6) attached inside the curved shield and the each end of these brackets will need to be clamped while gluing as the inner face of the shield isn’t flat due to the moulding process and the brackets will need a little help to sit snugly in positon due to this.
The assembled gun is then attached to the shield mounting brackets to complete the guns ready for adding to the mountings later.
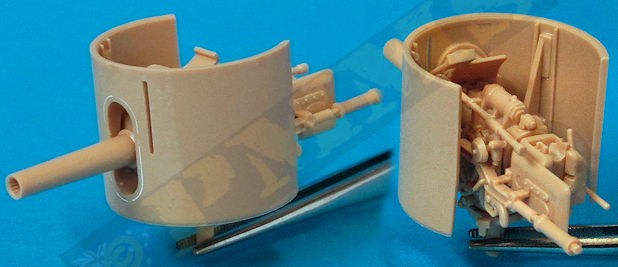
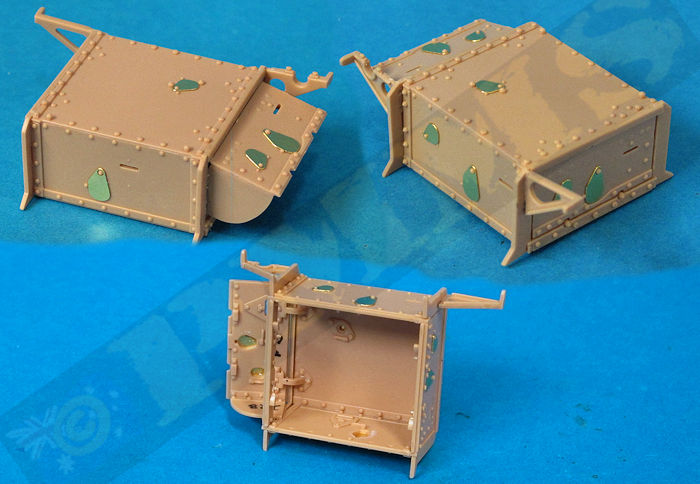
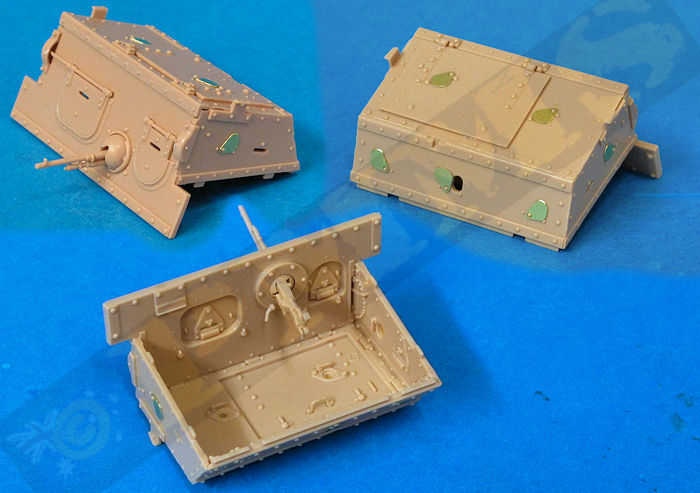
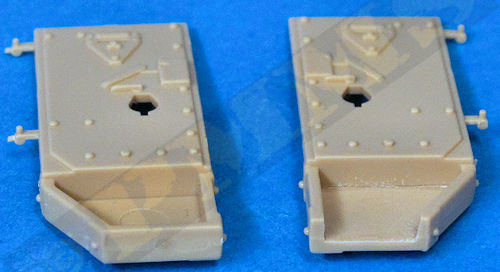
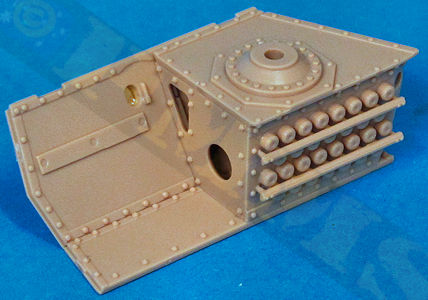
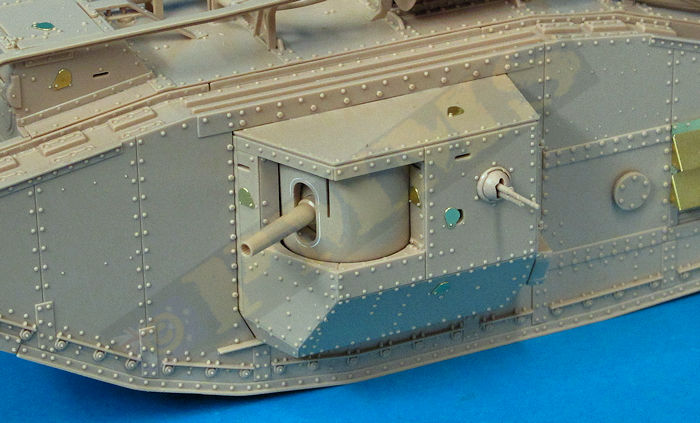
The large side sponson plate has the Hotchkiss MG and ball mounting added the same as previous in step 23 and again this is best done before the plate is assembled. With the MG in place the front, side and rear door plates can be added and again the fit is excellent. The rear door is separate and again there are small pins on the hinges to hold it open or closed and you simply cut off the pins not required to fit the door, also the spent shell chute in the door needs the lower edge of the door frame removed to represent this correctly.
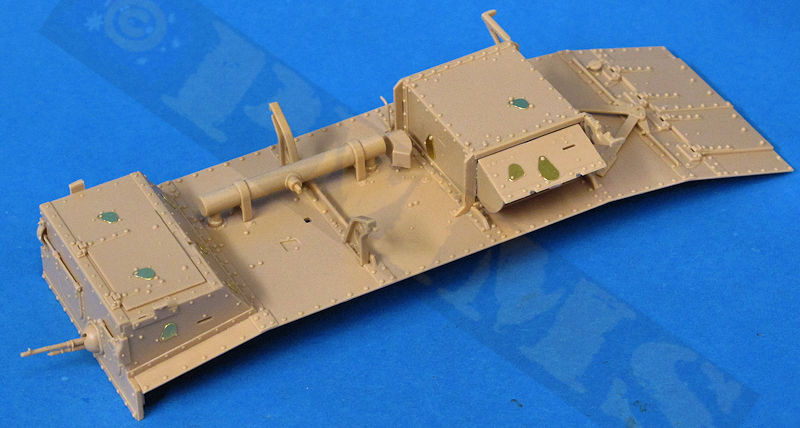
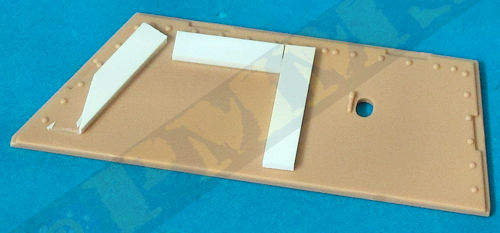
The gun is than fitted into the mounting using the poly cap to hold the large pin in place but the gun while secure in the mount is a little loose in that it can flop about a bit side to side and to prevent this you should add a 1mm plastic card spacer inside the roof to hold the shields even and prevent any sideways movement. I simply glued 1mm plastic strips under the roof but making a circular section of card using the shield as a guide is also an option (see images). With this spacer in place the roof is attached again with excellent fit and the gun and shields were perfectly secure and traversed without any lateral movement as it should.
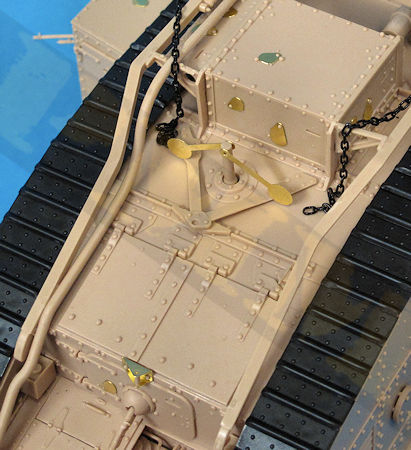
Finally there are the five etched pistol port covers and the assembled sponson can be attached to the right hull side opening, the fit again very good. A couple of other small hull fittings are added at this stage, the two side Epicyclic shaft boss cover (H20) and the rear hull mounting etched bracket (W11), this needed the location holes designed to fit over the hull rivets drilled out to 1mm diameter as they are too small as they come but this easily done.
1mm spacer added inside the roof to secure the gun shield after assembly as per above.
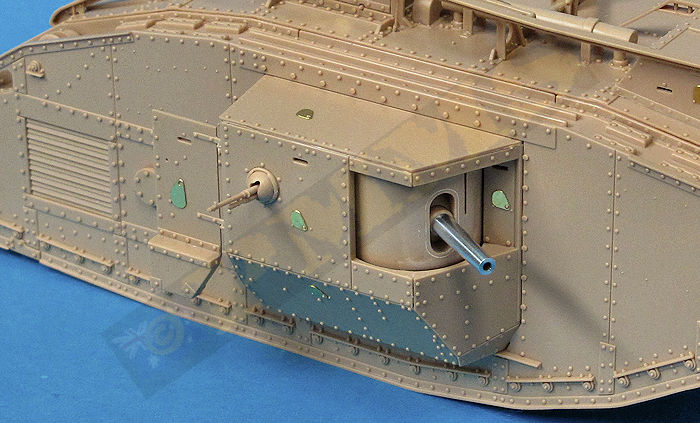
Assembled right sponson with rear door open.

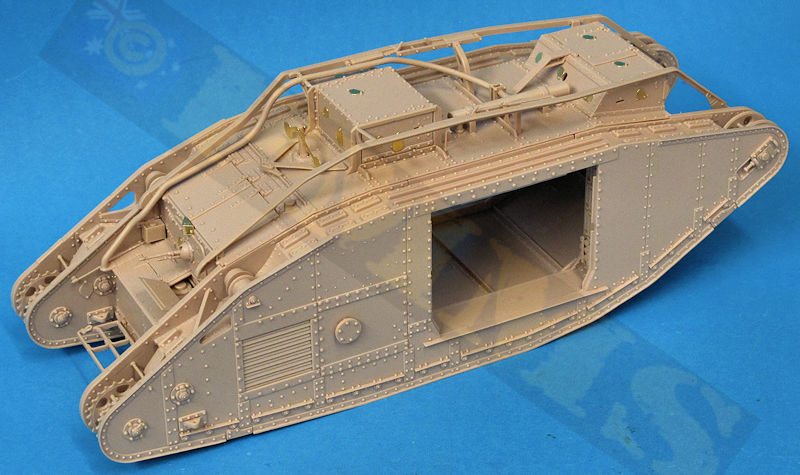
Sponson added to right track frame mounting.
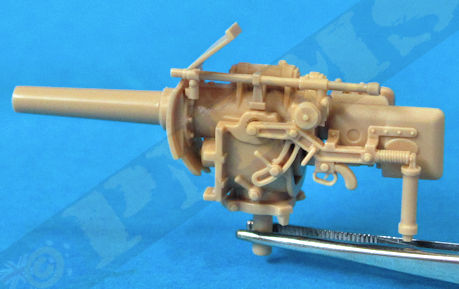
Note this has the LionMarc metal barrel used as per the main review.
When fitting the remaining plates to the lower gun mounting assembly the front plate (M12) is best added first and then the other two plates, followed by fitting the gun into the mounting. The same 1mm spacers were needed to be added inside the roof as with the right sponson to keep the gun level but other than that the assembly was perfect with the top plate and rear door fitting without problems as with the right sponson.
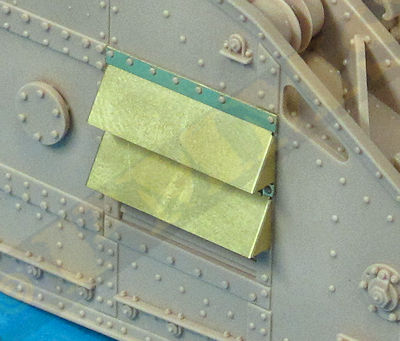
The sponson is then added to the hull side and again the fit was good and there is also the left side Epicyclic shaft boss cover (H20) and a choice of etched louver covers (W3, W4) which have the sides bend to shape and the holes fitting perfectly over the hull rivets. There is also alternate inverted V shaped ‘gutters’ to use in place of the covers and these are easily bent to shape using a good bending tool and again the holes for the rivets fit perfectly. The question is, which should you use? Going by the available period photos I could find the inverted V was mostly fitted to UK based vehicles while those in action in France mostly had the larger louver covers fitted.
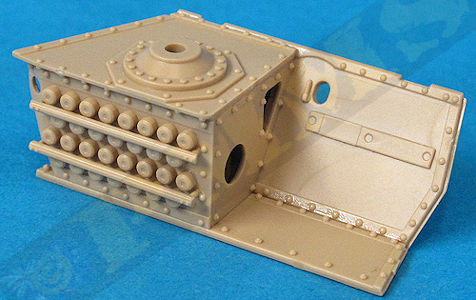
Gun opening frame assembly and outside plate with MG mounting.
1mm spacer added inside the roof to secure the gun shield after assembly as per above.
Assembled left sponson with rear door open.
Sponson added to left track frame mounting.
Etched louver covers.